
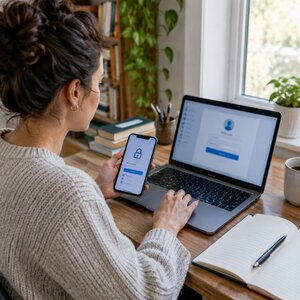
 Calm, careful steps can help you regain control and protect the accounts connected to your email.
A hacked email account can first show itself in an ordinary, unsettling way. A friend asks why you sent them a strange link. Contacts receive replies you never wrote. Your sent folder contains unfamiliar messages, or your password suddenly stops working. Maybe your provider sends a security warning, or mail you expected never arrives.
Take it seriously, but take it one step at a time. Your mailbox is a master key: password-reset links for many other accounts land there. Here’s what to do, in order.
First, pause. Don’t reply to the thief.
Don’t panic, and don’t email your account asking who is there. You may only give the intruder another chance to read your response. Don’t click links or open attachments in suspicious messages, either.
If you can, use a device you trust for the recovery steps. If the device seems infected or behaves strangely, use another trusted device.
Step 1: Get back into your account
Go directly to your email provider’s official website or app. Don’t use a sign-in link from an unexpected message.
If you’re locked out, type the provider’s official account-recovery address into your browser yourself. Follow its instructions, and be ready to wait while it verifies that the account belongs to you. That wait can be frustrating, but it’s safer than trusting a stranger who offers a shortcut.
Step 2: Change the password
Once you regain access, change the email password first. Choose a password you haven’t used elsewhere.
Then change it anywhere else you reused it. Reusing one password is what can turn one break-in into several: if someone learns it from one account, they can try it on others.
Start with accounts that can reach money, sensitive information, or more account-recovery options. A password manager can help you create and keep unique passwords.
Step 3: Check the settings that are easy to miss
A password change doesn’t necessarily remove quiet changes made inside your mailbox. Go through the security and mail settings carefully. Remove or correct anything you don’t recognize.
Check for:
- A new recovery email address or phone number.
- A forwarding rule or filter that copies, hides, or moves incoming mail.
- A filter that deletes replies or security alerts.
- An app password or unfamiliar connected third-party app.
- A changed email signature or automatic reply.
- A delegate or shared-access setting you didn’t add.
- A new folder that files replies out of sight.
Forwarding rules and filters are especially easy to overlook. They can keep copying or hiding messages even after you change your password. That could let someone watch for password-reset emails, or keep you from seeing replies.
If you find something suspicious, remove it and note what it was. Review the settings again after making changes to confirm they haven’t returned.
Step 4: Sign out other sessions
Use your provider’s security settings to sign out of every session and device. This matters because changing your password may not close every session that was already open.
Then check recent sign-in or security activity. Look for places, times, devices, or browsers you don’t recognize. If anything seems unfamiliar, record it and use the provider’s security or abuse-report channel.
Step 5: Check which accounts the mailbox could unlock
Your email account may help someone reset access to other services. Check the accounts connected to it, including:
- Bank and credit card accounts.
- Payment processors.
- Your domain registrar and website hosting control panel.
- Social media accounts and cloud storage.
- Supplier, customer, or other business portals.
Change passwords for those accounts, too. Start with money and domains. If someone controls your domain or hosting account, they may be able to disrupt your website or use your business identity.
Step 6: Warn people and contact your bank
Your name is now a trusted sender in your contacts’ inboxes. Let people know through a separate, trusted channel, such as a phone call or a different email account.
You can keep your warning plain:
My email account was compromised. Please don’t open recent links or attachments from me. I will never send a link asking for your password or payment.
Tell your bank the same day. If money moved or a card was used, contact your card issuer that day, too. Use the number on your card or the institution’s official website.
Step 7: Report the incident and keep notes
Report the problem through your email provider’s own security or abuse channel. If personal identity details were exposed, use the Federal Trade Commission’s IdentityTheft.gov recovery steps.
Keep a short record of dates, unfamiliar changes, account contacts, and the fixes you made. Those notes can help if you need to explain what happened or follow up later.
Step 8: Make the next break-in harder
Once your account is clean, take a little time to strengthen the setup:
- Turn on two-factor sign-in with an authenticator app rather than texted codes. For setup context, see our guide to authenticator apps and text codes. The Cybersecurity and Infrastructure Security Agency’s guidance also encourages businesses to require multifactor authentication.
- Remove recovery email addresses and phone numbers that no longer belong to you.
- Use a password manager so each account has a unique password.
- Type a website address yourself instead of trusting a sign-in link in a message.
- Check whether a breach-notification service can alert you if your email address appears in a known data breach.
A stolen password from an old website is often how someone gets into a current mailbox. If your recovery phone is involved in a phone-number takeover, read about Subscriber Identity Module (SIM) swap scams.
If you run a business, check these risks too
A message with your name or logo can feel trustworthy to customers. An intruder may exploit that trust by sending fake invoices or changing bank details in a payment request. Warn customers and suppliers if they may have received suspicious messages.
Your mailbox may also control access to your domain registrar and hosting account. Make sure those accounts are protected, and review their recovery settings.
For a business, recovery email addresses and phone numbers should not depend on one person’s personal phone alone. Plan who can regain access if that person is unavailable or loses the device.
Keep going, and ask for help if you need it
An afternoon spent recovering and securing your accounts now can spare you a very bad week later. Work through the steps in order, and don’t leave suspicious settings for “sometime later.”
If this feels over your head, ask for help rather than leaving the recovery half done. Hopefully, these steps will help you regain control with a little more confidence.










 European Union General Data Protection Regulation Compliant