by Charles Oropallo | Nov 12, 2026 | Do-It-Yourself, Internet, Security, Small Business, The CW Corner
 Public Wi-Fi safety matters whenever you connect at a coffee shop, airport, hotel, or other shared place. These networks are convenient, but you do not control who set them up or who else is connected. That calls for sensible caution, not panic.
The familiar warning that everyone nearby can automatically read everything you do is too broad. Modern websites and apps often encrypt their connections. Still, the network itself can create risks, and a convincing fake hotspot can fool you into connecting.
Here’s what to watch for, and how to make safer choices without giving up your coffee-shop table.
What can someone on public Wi-Fi see?
When you use an open or poorly secured network, other people may be able to observe some network activity. The risk is greater when a website or service sends information without encryption.
HTTPS (Hypertext Transfer Protocol Secure) encrypts the connection between your browser and the website you visit. That helps keep the contents of your connection private while they travel across the network. It is common on websites and in apps today.
But encryption is not a reason to stop paying attention. A network operator may still see some connection details, such as which online services your device contacts. And HTTPS cannot protect information you type into a fake website or sign-in page.
For a quick reminder about secure website connections, see our earlier article on SSL (Secure Sockets Layer). We’ll keep the details simple here: check the address and connection, and don’t ignore browser warnings.
Watch for fake look-alike hotspots
One realistic risk is a fake hotspot designed to look like the venue’s real network. It may use a similar name, a slightly different spelling, or a name suggesting “free Wi-Fi.” A stronger signal does not prove that a network is genuine.
Imagine sitting in an airport and seeing two networks with nearly identical names. You might choose the first one, connect, and see a sign-in page that looks familiar. If the network is controlled by someone else, that page could be designed to collect information.
Before connecting, ask staff for the exact network name and any instructions. Use the venue’s official signage as a helpful reference, but verify if anything looks unusual. Be wary of unexpected requests for passwords, payment details, or extra downloads just to get online.
A lock symbol beside a network name does not confirm that the network belongs to the business. It only indicates that a password or other protection is involved. Confirm the name with staff instead of guessing.
The Cybersecurity and Infrastructure Security Agency (CISA) describes fake “evil twin” hotspots and advises confirming a public network’s name before using it. Read its wireless network safety guidance.
Use a personal hotspot for sensitive tasks
When practical, use your phone’s cellular connection or personal hotspot for sensitive work. That can be a better choice for banking, payment tasks, business administration, account recovery, or handling private client information.
A personal hotspot uses your phone’s mobile data connection to provide internet access to your other device. It avoids the coffee shop’s shared Wi-Fi network, although it does not replace other good security habits. Use a strong hotspot password, and switch the hotspot off when you are finished.
If cellular service is weak or unavailable, pause and consider whether the task can wait. Reading a news story is different from changing the password for your business email. A little patience can be a worthwhile security measure.
Check the website before signing in
If you do use public Wi-Fi, check that important websites use HTTPS and that the web address is the one you intended to visit. A lock icon can indicate an encrypted connection, but it does not prove the website itself is genuine.
Look closely at the address before entering a password or payment information. A fake page can use a name that resembles a real business. If your browser shows a certificate or security warning, stop. Don’t click through just to make the warning go away.
When possible, avoid signing in to sensitive accounts on a shared network. If you must access one, use the official app or type the website address yourself. Do not rely on a link from an unexpected message or a pop-up from the Wi-Fi network.
Public Wi-Fi may also ask you to accept terms on a sign-in page, often called a captive portal. A basic access page can be normal. But be cautious if it asks for your email password, banking credentials, a one-time sign-in code, or an unexpected software installation. When in doubt, disconnect and ask venue staff.
For more help with spotting fraudulent messages and links, see our existing article about phishing. The key point here is simple: don’t hand over account details just because a page appeared after you connected.
Turn off automatic connections and file sharing
Your device may automatically join networks it has used before. That can be handy at home, but it can also lead your device to connect without you noticing.
Turn off automatic joining for public networks, or remove networks you no longer need. Then choose a network manually when you arrive. If a familiar network name appears in an unfamiliar place, verify it before connecting.
Also turn off file sharing and network discovery when using public Wi-Fi. These settings can make your computer visible to other devices nearby. CISA recommends disabling file sharing on public networks. You can enable it again when you return to a trusted network, if you need it.
Keep your phone, computer, browser, and apps updated. Updates fix known problems and help protect the device you carry between home, work, and public spaces. A screen lock also matters if someone can physically reach your device.
What does a VPN do?
A VPN (virtual private network) creates an encrypted connection between your device and a VPN service. Think of it as a protected tunnel through the shared network. It can make it harder for other people on that Wi-Fi network to observe your traffic.
A reputable VPN can be useful when you regularly use public Wi-Fi, especially for work. But it is not an invisibility cloak. The VPN service becomes part of your connection, and you still need HTTPS for the connection between the VPN service and the website.
A VPN also cannot make a fake sign-in page trustworthy. It will not protect you if you enter your password into a look-alike website or install a harmful app. Choose a VPN carefully, keep its app updated, and treat requests to install certificates or unfamiliar software as a reason to pause.
If you connect to public Wi-Fi often for business, ask your IT provider or support contact whether a VPN is appropriate for your work.
Keep your sign-in habits strong
Public Wi-Fi safety works best alongside the account protections you use everywhere else. Two-factor authentication (2FA) adds another sign-in check beyond your password. It can help if someone learns that password, though it cannot make a fake login page safe.
We recently covered authenticator apps and text codes. That article explains how those sign-in options differ. Use the protections available on your important accounts, especially email and business services.
A practical routine before you connect
Before joining a coffee-shop, airport, or hotel network, take a moment to:
- Ask staff to confirm the exact network name.
- Turn off automatic joining and file sharing.
- Use your phone’s hotspot for sensitive tasks when practical.
- Check the web address and HTTPS before signing in.
- Stop if you see a browser warning or an unusual portal request.
- Use a reputable VPN when appropriate, while continuing to check websites.
Public Wi-Fi is not automatically dangerous, and you do not need to treat every café like a spy movie. Just remember that a shared network is outside your control. Verify the hotspot, protect your device, and save sensitive work for a safer connection when you can.


by Charles Oropallo | Nov 11, 2026 | Do-It-Yourself, Internet, Passwords, Security, Small Business, The CW Corner
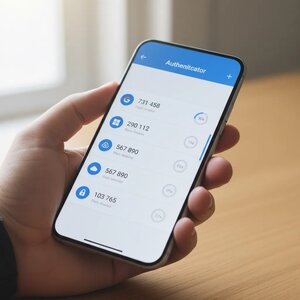
Authenticator apps vs. text codes is a practical security choice for your email, business website, and other important accounts. Both add a step beyond your password, but they protect that step differently. For most people, an authenticator app is safer than a code sent by text.
What is two-factor authentication?
Two-factor authentication (2FA) asks you to prove your identity in two different ways. Usually, you enter something you know, such as your password, and confirm something you have, such as your phone.
That extra check can help if someone steals or guesses your password. They may still need access to your phone or authenticator app before they can sign in.
Two-factor authentication is not a guarantee against every threat. It does make password-only access harder, which is a worthwhile improvement for important accounts.
How do text message codes work?
With short message service (SMS) verification, the website sends a temporary code to your phone number. You enter that code after your password to finish signing in.
It is familiar and usually easy to set up. But SMS depends on your phone number and mobile carrier, which creates some weaknesses.
- SIM swap scams: A scammer may trick your carrier into moving your number to a phone they control. This is called a subscriber identity module (SIM) swap. If successful, they may receive your login texts.
- Lost or unavailable phone: You may be unable to receive codes if your phone is lost, its battery is dead, or you have no service.
- Delayed or missing messages: Texts do not always arrive promptly. That can leave you waiting when you need access.
- Visible or accessible messages: A code might appear in a lock-screen notification. Depending on your settings and apps, messages may also be accessible in other places.
SMS codes are still better than using only a password in many situations. But they rely on a phone network and number that can be targeted or temporarily unavailable. The Cybersecurity and Infrastructure Security Agency (CISA) advises using text-based codes only as a last resort when stronger options are unavailable. See its multifactor authentication guidance.
How does an authenticator app work?
An authenticator app creates a temporary code on your phone or computer. During setup, the account and app share a secret, usually transferred by scanning a quick response (QR) code. The app uses that secret and the current time to create a six-digit code.
The code is generated locally, inside the app. Your phone does not need mobile service or an internet connection to display it. So, the code can still appear in airplane mode or where reception is poor.
You will generally need internet access to reach the website and complete sign-in. “Works offline” means the app can generate the code without a network connection. It does not mean you can sign in to an online service without internet access.
Unlike an SMS code, the authenticator code does not travel through your carrier’s text messaging system. A SIM swap alone does not give a scammer the secret stored in your authenticator app.
Which option is safer?
When you can choose between SMS and an authenticator app, an authenticator app is generally safer. Its code is not tied to your phone number, so a SIM swap will not automatically send your codes to someone else.
That does not make authenticator apps invulnerable. Someone who steals your password and tricks you into entering a current code on a fake sign-in page may still get access. Protect your device, check the website address, and do not share codes with anyone who contacts you unexpectedly.
Some accounts offer stronger sign-in methods, including passkeys. Passkeys can provide better protection against fake login pages. We explain how they work in Passkeys Explained: Signing In Without a Password.
How to set up an authenticator app
The steps vary a little by website, but the process is usually straightforward:
- Open the real website or app yourself. Avoid setup links in unexpected emails or text messages.
- Go to its security or sign-in settings. Look for an authenticator app, verification app, or two-step sign-in option.
- Choose the app option. The service should show a QR code and explain what to do next.
- Open your authenticator app and scan the code. Follow the service’s instructions, then enter the app’s current code to confirm setup.
- Save the recovery codes. Store them somewhere safe, such as a printed sheet in a secure place or a password manager you can access independently.
- Test your new sign-in. Sign out and sign in again while your existing method still works.
Do not photograph a recovery code casually or leave it beside your computer. Treat it like a spare key: anyone who gets it may be able to access your account.
Keep the old method available until you have tested the app and confirmed your recovery options. Then review the account’s settings. Some services keep SMS enabled as a fallback, even after you add an authenticator app.
What if you get a new phone?
Plan the move before you retire your old phone. Many authenticator apps have a way to transfer accounts, but the process varies by app.
Follow the app’s official transfer instructions while you can still use the old device. Add the authenticator to your new phone, test sign-in, and make sure your recovery codes are available. Only then remove the old device or erase it.
If your old phone is already gone, use the service’s recovery process. This is exactly why saving recovery codes during setup matters.
Keep the rest of your account secure
An authenticator app is software running on a device. The device could be lost, stolen, or compromised. Keep its operating system updated, use a secure screen lock, and review which notifications appear on your lock screen.
Your email recovery account matters, too. If someone can take over your email, they may be able to reset passwords elsewhere. Protect that inbox with a strong, unique password and two-factor sign-in. A password manager can help you keep unique passwords without memorizing every one.
A simple way to get started
You do not have to update every account today. Turn on two-factor authentication with whichever method a site offers first. Any extra sign-in check is generally better than relying on a password alone.
When you are ready, move your most important accounts to an authenticator app. Start with email, then consider banking, domain registration, website administration, and other accounts that could affect your business. Keep recovery details safe, and test each change before removing an older sign-in method.
For more on safer sign-ins, read Passkeys Explained: Signing In Without a Password and Password Managers: One Key for a Whole Ring of Locks.
by Charles Oropallo | Nov 10, 2026 | Do-It-Yourself, Internet, Security, Small Business, The CW Corner
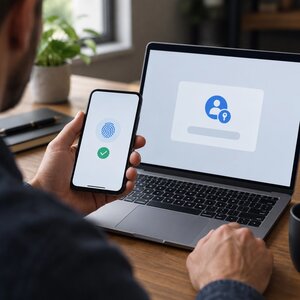 Yesterday, we explained how password managers help you avoid reused passwords and protect your accounts. Today, let’s look at passkeys, another way to make signing in simpler and safer.
A passkey lets you sign in without typing a password. You approve the login using your fingerprint, face, or device personal identification number (PIN). For many small-business owners, that can mean fewer passwords to remember and less risk from fake login pages.
Passkeys may sound technical, but using one is usually straightforward. Here’s what happens and what you should know before trying one.
What is a passkey?
A passkey is a digital credential that your device or password manager keeps for a specific website or app. You unlock it with the same method you use to unlock your device, such as a fingerprint, face scan, or PIN.
The security behind a passkey uses a pair of digital keys. One stays with your device or passkey provider. The website keeps the matching public key, which can confirm your sign-in but cannot sign you in by itself.
In everyday terms, think of the public key as a lock and the private key as the key that opens it. The website can check that your passkey fits, but it never receives the private key. There is no password sitting on the website’s server for a thief to steal.
Your fingerprint or face data also stays on your device. The website receives confirmation that you approved the sign-in, not your biometric information.
How does signing in work?
When a website supports passkeys, you may see an option to create one or sign in with one. The exact wording varies. You might see “Passkey,” “Sign in with your fingerprint,” or “Sign in with your face.”
The usual steps are simple:
- Visit the real website or open its app.
- Choose the passkey sign-in option, or select the passkey saved for that account.
- Approve the request using your fingerprint, face, or device PIN.
Your device then completes the secure exchange with the website. You do not have to type or remember a password for that sign-in.
Why do passkeys help resist phishing?
Phishing is when someone tries to trick you into giving away information, often through a fake email, text, or website. A lookalike sign-in page may fool someone into typing a password. A passkey is designed to work only with the genuine website it belongs to.
For example, suppose a message directs you to a fake business email login page. Your passkey for the real email service will not provide the fake page with a usable login credential. The passkey checks the website’s identity as part of the sign-in process.
That is a major difference from a password, which you can accidentally type into the wrong page. Still, passkeys do not make every device or account risk-free. Keep your devices updated, secure your accounts, and treat unexpected login prompts carefully.
For more help spotting suspicious messages and links, see our post on rampant phishing.
Where are passkeys stored?
Passkeys may be stored in the built-in accounts and services you already use. Apple, Google, and Windows offer ways to manage passkeys within their ecosystems. Some password managers can store passkeys, too.
A passkey may be synchronized across your devices through the account or manager that stores it. For instance, a passkey saved through a provider may become available on another phone or computer signed in to the same provider.
Other passkeys are saved only on one device. These are often called device-bound passkeys. They do not sync elsewhere, so losing that device can make access more difficult unless you have another sign-in or recovery option.
Before creating one, notice which account or service will store it. You may need access to that account when setting up a replacement device.
What happens when you get a new phone or computer?
If your passkey syncs through an account, setting up the same account on a new device may make the passkey available there. Follow the provider’s instructions and complete any identity checks it requires.
If your passkey exists only on your old device, you may need to use the website’s recovery process or another sign-in method. Some sites let you add more than one passkey, which can help avoid relying on a single device.
You may also be able to sign in on a computer using a nearby phone. Choose an option such as “use a passkey from another device.” The computer may show a quick response (QR) code for your phone to scan. Approve the sign-in on your phone, and it can confirm your identity without moving the passkey onto the computer.
A QR code is not a backup passkey. It is simply a way for your phone to approve a sign-in on a nearby device.
Are passkeys the same as two-factor authentication?
A passkey generally replaces the familiar password-plus-code sign-in. You have the device holding or accessing the passkey, then prove it is you using a fingerprint, face, or PIN. Together, these steps make up the sign-in.
However, websites handle passkeys differently. Some may still ask for a password, an additional code, or another check in certain situations. Follow the instructions shown by the service, and do not assume every passkey login works exactly the same way.
If you want to understand the technology behind passkeys, the FIDO Alliance’s passkeys guide offers more detail. FIDO means Fast IDentity Online, the organization behind standards used for passkey sign-ins.
What are the limits?
Passkeys are useful, but they are not a perfect fit for every situation.
- Shared computers can be awkward. A passkey on your personal phone may be more convenient than saving a credential on a computer used by several people.
- Recovery depends on the service. Check what happens if your phone is lost, your passkey provider account is unavailable, or you change platforms.
- Email recovery matters. Many accounts use your email address to help restore access. Keep that inbox secure and make sure its recovery options are current.
- Some sites still require passwords. A service may offer passkeys for some sign-ins while keeping passwords for other steps or recovery.
For a small business, consider who controls the accounts used for email, banking, domain registration, and website administration. Make sure those accounts have sensible recovery arrangements, not just a sign-in method that works today.
How to start using passkeys
You do not need to switch every account at once. Start with an important account that offers passkeys and has a recovery process you understand.
Your email account is a practical place to begin because it can be used to recover access to other services. Open the official website or app yourself, then look under security or sign-in settings. Search for “passkey,” “passkeys,” or an option to sign in with your fingerprint or face.
Create the passkey, then test it while your existing sign-in method still works. Sign out and try signing in again. Check that your other devices and recovery options are ready, too.
Do not delete your password or remove another sign-in method until the passkey works reliably. A little overlap while you test is much less frustrating than getting locked out.
Passkeys can make everyday sign-ins easier while making phishing attempts harder to pull off. Start with one important account, learn how its recovery works, and add more when you feel comfortable.
For a related look at password managers, read Password Managers: One Key for a Whole Ring of Locks. Used together where appropriate, these tools can help you take better care of your online accounts.
by Charles Oropallo | Nov 9, 2026 | Do-It-Yourself, Passwords, Security, Small Business, The CW Corner
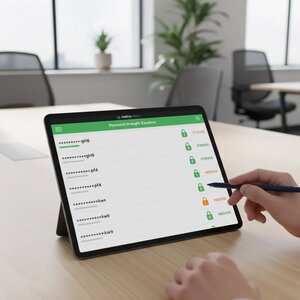
Password managers can make safer online habits much easier. Instead of trying to remember every login, you remember one strong master passphrase. The manager creates and stores different passwords for your other accounts. That can help protect your email, banking, business website, and everyday online services.
The trouble with reused passwords
Remembering passwords can feel like a chore. It is tempting to use one familiar password everywhere, then add a number when a website asks for a change. Unfortunately, that convenience can create a chain reaction.
If one website is breached, criminals may try the exposed password on other sites. They often test email, banking, shopping, and social accounts. If the same password works in several places, one stolen login may put many accounts at risk.
Weak passwords have a similar problem. A pet’s name, a favorite team, or a simple keyboard pattern may be easy to guess. Personal details can also be available through public profiles or other online sources.
The real challenge is not that you have many accounts. It is making sure one account’s password cannot unlock the rest. Unique passwords help break that chain.
What a password manager actually does
Think of a password manager as a locked digital key ring. It stores your logins in a protected vault and helps you use the right one when you visit a website or app.
Most managers can also generate passwords for you. These can be long, random, and different for each account. You do not need to memorize a jumble of letters and symbols. The manager remembers it for you.
You unlock the vault with a master password or passphrase. That is the one you need to know by heart. Depending on the product, the manager may also fill in login details through a browser extension or mobile app.
Some products synchronize your vault across devices. That means you can access it on your computer and phone, rather than relying on a single device. Check how a manager stores and synchronizes your information before choosing one.
How to choose a manager
Choose carefully, because the vault protects access to many accounts. There is no need to pick the first app you see in an advertisement. Look for a product with a trustworthy track record and clear information about its security and recovery options.
Consider these features:
- A reputation you can check. Read independent reviews and look for clear, current information about security practices.
- Cross-device access. Confirm it works on the computers and phones you actually use.
- Browser integration. A browser extension can make logins easier. Make sure it comes from the manager’s official website or app store.
- Synchronization details. Understand how your vault stays available across devices and what happens if you lose access.
- Recovery options. Learn whether the provider can help restore access, and what information that process requires.
A browser extension can also help you notice when a login page is unfamiliar. Still, pause before entering details, especially when you arrived through an unexpected email link. A password manager cannot make every phishing page safe.
The U.S. Cybersecurity and Infrastructure Security Agency recommends password managers as a way to create and manage unique passwords. You can read its guidance on strong passwords.
Make the master passphrase memorable and private
Your master passphrase protects the vault, so it deserves special attention. Make it long and difficult for someone else to guess. A few unrelated words can be easier to remember than a short, complicated string.
Do not reuse a password from another account. Do not use a familiar quotation or personal detail that someone could guess. And do not share the passphrase in email, messages, or with people who do not need access.
You might be tempted to write it on a sticky note. We understand the temptation, but a note beside your computer is not a great security plan. If you need a backup, follow the manager’s guidance and keep recovery information somewhere protected and separate from your everyday devices.
Turn on two-factor authentication, too
A strong master passphrase is important, but it should not be your only safeguard. Turn on two-factor authentication for the password manager if it is available. This requires another proof of identity, such as an approval from an authenticator app or security key.
Use two-factor authentication on your important email, banking, domain, and website accounts as well. Your email account deserves special attention because it may receive password-reset links for other services.
This extra step can help protect an account if someone learns your password. It is not a reason to relax about suspicious links or unexpected login requests. Verify those independently.
Switch over gradually
You do not need to update every account in one sitting. Begin with accounts that could unlock other accounts or cause serious problems if someone accessed them.
A practical order might be:
- Secure your email. Set a unique password and enable two-factor authentication.
- Update banking and payment accounts. Give each one its own generated password.
- Protect your business website and hosting logins. Include your domain registrar and other services that control your online presence.
- Work through the rest of your accounts. Update them when you sign in or have a few quiet minutes.
For each account, open the real website or app yourself. Sign in, change the old password, and save the new one in your manager. Avoid following password-change links from unexpected messages.
Some accounts may have unusual password rules. If a generated password is rejected, adjust the manager’s settings and try again. Do not solve the problem by reusing an old password everywhere.
As you move accounts, check for duplicate or outdated entries in the vault. Remove entries only when you are sure you no longer need them. A slow, orderly switch is much better than a rushed afternoon of login confusion.
What if you forget the master passphrase?
This is the part to understand before you begin. Depending on the manager’s design and your recovery settings, forgetting the master passphrase could mean losing access to the vault. Some providers may be unable to reset it or restore the information inside.
Read the provider’s recovery instructions while you still have access. If it offers recovery codes or another recovery method, learn how that works. Store any recovery information in a protected location, separate from the vault and the devices it protects.
Do not assume that support can recover everything. Strong protection can mean the provider cannot read your saved passwords. That privacy benefit may also limit what support can do if you lose the master passphrase.
Consider how you would recover access before filling the vault. Set up available recovery options, keep your devices updated, and make sure your recovery email account is secure. A little planning now can prevent a very frustrating surprise later.
Safer than sticky notes or password reuse
No tool removes every risk. A password manager still needs a strong master passphrase, secure devices, and sensible recovery planning. It is also wise to install updates and pay attention to account security alerts.
Even so, using a manager is generally safer than repeating one password across important accounts. It is also safer than leaving login details on a note beside your screen. The manager helps you use unique passwords without expecting you to memorize them all.
For a small-business owner, this can make website, email, and payment access easier to manage responsibly. For everyday users, it means fewer reused passwords and less guesswork at sign-in. Start with your most important accounts, then keep going at a comfortable pace.
For more practical security advice, see our posts on passwords and best practices for mitigating website hacks. You may also find our article about phishing attacks helpful. Hopefully this tip makes your online key ring easier to manage, and a lot less likely to be a sticky note.
by Charles Oropallo | Nov 8, 2026 | Do-It-Yourself, SEO, Small Business, The CW Corner
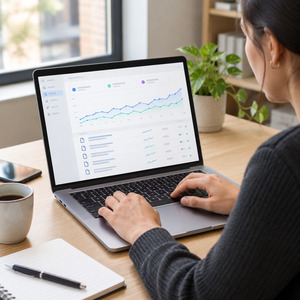 Google Search Console is a free Google tool that helps you see how your website appears in Google Search. It can show which searches brought your pages into view, which pages Google has indexed, and whether Google found potential problems.
Think of it as a window into Google’s view of your site. It will not tell you everything, and it will not promise better rankings. But it can help you spot useful opportunities and issues before they become bigger concerns.
Search Console and analytics answer different questions
Website analytics tools help you understand what people do after they arrive. You might see which pages they visit or whether they submit a form.
Search Console looks earlier in that journey. It shows how your site appeared in Google Search before someone clicked. You can see queries that showed your pages, impressions, clicks, and related search details.
That difference matters. If a service page receives impressions but few clicks, its title or description may not make its value clear. If it receives few impressions, you may want to check whether Google has found and indexed it.
For a closer look at visitors and on-site activity, see our related article about reading website statistics.
First, verify that you own the site
To access a website’s information, you need to prove you control it. Google calls this process ownership verification. The available method depends on your website setup and access.
Common options include:
- Uploading an HTML (HyperText Markup Language) verification file: You place a file supplied by Google on your website.
- Adding a DNS (Domain Name System) record: You add a record through the service managing your domain.
- Verifying through your web host: Some hosting or site-management services offer a direct connection.
A domain property can cover your main domain and its subdomains. A URL (Uniform Resource Locator) prefix property covers a more specific address, such as a particular version of your site.
Choose the property that fits your needs, and keep its verification method in place. If you are unsure where to add a file or record, ask your web host or developer. Google explains the options in its site ownership verification guide.
The main reports, in everyday language
Search Console has several reports. You do not need to study every screen to get started. These are useful places to look.
Performance: What appeared, and what got clicked?
The Performance report shows how your pages did in Google Search during a selected period. It can display search queries, pages, impressions, clicks, and average position.
An impression means a result from your site appeared in a Google Search result. A click means someone selected that result and visited your site.
The report can help answer practical questions. Which pages are appearing? What words are people searching? Are people clicking through to the pages they see?
You can review information by query, page, device, or other available filters. Treat these figures as clues, not a complete explanation of customer behavior. Search Console records search activity, not every reason someone chooses to call or buy.
Indexing or Pages: Which pages does Google know about?
The Page indexing report shows pages Google knows about and whether they are indexed. It may also list reasons some pages are not indexed.
Not every excluded page is a problem. Duplicate pages, pages you intentionally marked not to appear, and removed pages may be excluded for sensible reasons. Focus on important pages, such as your main services, products, and contact information.
If a valuable page is not indexed, review the reason shown. It could be inaccessible, blocked, or simply not discovered yet. Google’s Page indexing report guide explains what its status information means.
URL Inspection: Check one particular page
The URL Inspection tool lets you check an individual page address. It can show whether Google has an indexed version and whether the current page appears available for indexing.
This is handy after publishing an important page or making a substantial update. Enter its address and review what Google reports. If appropriate, you can request indexing.
A request is not an instant update or a guarantee. Google still decides when to crawl and index a page. Think of the request as asking Google to take another look, not pressing a magic “show me now” button. See Google’s URL Inspection tool guide.
Mobile usability and page experience: Is the site comfortable to use?
Some Search Console accounts show mobile usability or page experience information. What appears can vary as Google updates its reports.
These checks can highlight issues affecting how people experience your site on phones or how quickly pages respond. Use any warnings as prompts to investigate, not as proof that your entire site is broken.
Try the pages yourself on a phone, too. Can a customer read your service details, find your phone number, and use your contact form without frustration? A real-world check is still useful.
Security issues and manual actions: Check important alerts
Security issues can warn you about concerns such as harmful or hacked content. Manual actions are different. They indicate that Google has identified a search-policy violation affecting some or all of a site.
Take either alert seriously. Read the report, follow Google’s instructions, and get help if you are unsure what changed. Do not ignore an alert simply because the homepage still looks normal.
What to do when you find an error
First, read the explanation and identify which pages are affected. Then check whether the listed issue is real and whether those pages should be available to Google.
If something needs fixing, correct the underlying problem first. For example, remove an accidental block or restore a page that should be accessible. Afterward, use the available validation option or request indexing for the page, if appropriate.
Google may take time to revisit and process changes. A submitted request does not mean the issue is fixed immediately, and repeated requests do not make the process instant. Give Google a chance to recrawl the corrected page, then check the report again.
If the warning concerns security, or you do not understand its cause, contact a qualified developer or hosting provider. A calm, careful investigation is better than guessing at technical settings.
Submitting a sitemap
A sitemap is a file that lists pages you want search engines to know about. It can be useful for a growing website or a site with pages that are not easy to discover through links.
Your sitemap must already be available on your website. Search Console does not create or host it for you. Once you have its address, you can submit it in the Sitemaps report.
A submitted sitemap helps Google discover listed pages, but it does not guarantee that Google will index them. Check the report afterward for any processing messages or issues. Google provides details in its sitemap submission guide.
Why average position can feel humbling
Average position summarizes where your results appeared across recorded searches. It is not a promise that every person sees your page in that exact spot.
Your results can vary by query, location, device, and other factors. A page might appear near the top for one search and much lower for another. Averaging those appearances can produce a number that feels less flattering than expected.
Use the measure to notice broad changes or compare related pages. Do not treat it as a fixed ranking for one phrase, or let one number distract you from useful clicks and enquiries. Google explains how impressions, clicks, and position are counted.
A simple weekly Search Console routine
You do not need to live in the dashboard. A short, regular check can help you notice changes while keeping the process manageable.
- Open the Performance report. Review the pages and queries receiving the most impressions and clicks.
- Look for useful questions. Are important services appearing? Do the search terms match what your business offers?
- Check indexing. Review the Pages report for important pages that are excluded or have errors.
- Inspect a key page when needed. Use URL Inspection after publishing or substantially updating an important page.
- Review alerts. Check for security issues or manual actions, and follow up promptly.
Look for patterns rather than reacting to every small change. If a service page appears in search but people rarely click it, consider whether its title clearly describes what customers will find. If a key page is missing from indexing, investigate the reported reason.
Start with a useful peek
Google Search Console gives business owners a practical view of search visibility and technical signals. It complements analytics, but it answers a different question: how your website is appearing in Google before visitors arrive.
Start with the Performance and Pages reports, then check specific pages or alerts as needed. For more background, read our guide to how people find your website through search.
If you would like help understanding Search Console or resolving a website issue, CharlesWorks is here to help.
by Charles Oropallo | Nov 7, 2026 | Do-It-Yourself, Small Business, The CW Corner
 Website stats can help you understand how people find and use your site. You do not need a statistics degree or a complicated dashboard to start. A few basic measures can show whether your website is reaching potential customers and helping them take useful next steps.
Think of website statistics like a shop’s visitor log. They can show how many visits happened, which pages attracted attention, and where visitors came from. They cannot tell you exactly who every visitor is, and they do not explain everything on their own. Still, they can point you toward helpful questions.
Start with the numbers that answer real questions
Analytics tools use several terms that sound alike. Understanding the differences makes reports easier to read.
Users estimate how many individual people visited during a selected period. This is an estimate, not a perfect headcount. Different devices, browsers, and privacy settings can affect how a tool recognizes visitors.
Sessions count visits. One person can visit your website more than once, creating multiple sessions. So, a higher session count does not necessarily mean you reached the same number of different people.
Page views count how often pages were viewed. If someone reads three pages during one visit, those pages may each count as a view. Page views can show what visitors looked at, but they do not tell you whether those pages helped.
These terms are not interchangeable. Google explains the difference between users and sessions. For a business owner, the key is knowing what each measure represents before drawing conclusions.
Find out where visitors came from
Your report may group visits by source or channel. These categories describe how people reached your website.
- Organic search means someone arrived through unpaid search results.
- Direct traffic generally means the report could not identify another source.
- Referral traffic comes from a link on another website.
- Social traffic comes from social media.
- Email traffic comes from a link in an email campaign.
These labels can be useful, but they are not a complete explanation. For example, a direct visit might come from someone typing your address. It might also come from a link that did not pass along its source information.
Some analytics tools separate how a new visitor first found you from how a particular visit began. Google Analytics 4 (GA4) has separate user acquisition and traffic acquisition reports. Google explains the difference in its guide to acquisition reports.
If you send newsletters or post campaign links, use consistent labels when available. That makes it easier to tell which email or promotion brought visits. Avoid changing the labels every time. A little consistency saves confusion later.
Look at the pages people enter and leave
A landing page is the first page someone sees during a visit. It may be your homepage, but it could also be a service page, product page, or article.
Check which pages bring people in. If a page about a particular service attracts visitors, that may show people are looking for that information. Make sure the page explains the service clearly and provides an easy next step.
It is also useful to notice where visits end. A visitor leaving after one page is not automatically a problem. They may have found your phone number, hours, or answer quickly. On the other hand, if people repeatedly leave a page that should lead to a booking or enquiry, it may deserve a closer look.
Ask practical questions. Is the page easy to read on a phone? Is the contact button visible? Does the page match what the visitor expected to find? A small improvement can matter more than another chart.
Treat engagement as a clue, not a grade
Analytics tools may report engagement, meaning visits that included signs of interaction. In GA4, an engaged session can involve a longer visit, multiple page views, or a recorded key event. The Google Analytics guide to engagement explains how its measures work.
Engagement is a clue, not a grade for your business. Someone might spend little time on a page because they quickly found your address and called. Another visitor might stay longer because they cannot find the information they need.
Use the measure alongside the page’s purpose. A detailed article may benefit from careful reading. A simple contact page may do its job when visitors quickly send a message. Context matters more than a number by itself.
Measure actions that matter to your business
The most useful report connects visits to actions. What would you like someone to do after visiting your website?
Depending on your business, useful actions might include:
- Submitting a contact form.
- Requesting an estimate.
- Booking an appointment.
- Making a purchase.
- Signing up for an email list.
- Calling your business from a phone.
In GA4, important actions are called key events. But the tool can only report an action if it has been set up to record it. A form submission or phone link may need extra configuration.
Check that the action works before relying on its report. Submit a test form or try the booking process. If a real enquiry arrives but the analytics report shows nothing, the tracking may need attention.
Then compare actions with traffic sources. A smaller group of visitors that requests estimates may be more valuable than a larger group that does not contact you. Your goal is not simply to collect visits. It is to help the right visitors find what they need.
Compare fairly, and look for patterns
A single day can be unusual. Perhaps you sent an email, ran an event, or experienced a tracking problem. Avoid changing your entire website because of one unexpected spike or dip.
Instead, compare similar periods and look for patterns. Did visits from search increase after you updated a service page? Did a form stop receiving submissions after a site change? Did an email link lead people to the right offer?
Keep notes about changes you make. Record when you update pages, run promotions, or change your website. Otherwise, it can be difficult to connect a result with its likely cause.
When a number changes, check the basics before guessing. Is analytics still installed? Did a consent notice or website update affect tracking? Are the forms working? A tracking issue can make healthy website activity look like a sudden decline.
Respect visitor privacy
Analytics reports are intended to help you understand general patterns. They should not be used to identify or personally monitor individual visitors.
Do not send names, email addresses, or other personal details to an analytics service. Explain your data practices in a clear privacy notice, and follow applicable privacy rules. Google’s Analytics policy guidance covers restrictions on sending personally identifiable information.
If you are unsure whether your setup respects privacy requirements, ask a qualified professional to review it. Good measurement should help your business without treating visitors like suspects.
A simple routine is enough to begin
You do not need to study every chart. Start by checking visits, leading traffic sources, popular landing pages, and meaningful enquiries. Review those measures regularly, then ask whether they support your business goals.
If your reports seem confusing, write down the question you want answered first. “Are people finding our service page?” is clearer than “What does this whole dashboard mean?” Work through one question at a time, and the numbers become more useful.
For more practical reading, see our articles on what search engine optimization means, website engagement, and whether blogging is right for your website.
Hopefully, this tip will help!










 European Union General Data Protection Regulation Compliant