by Charles Oropallo | Oct 18, 2024 | Do-It-Yourself, Security, Technical Help, The CW Corner, Web Hosting
 If you secure many sites with free Let’s Encrypt SSL, you may hit a wall. Suddenly, certificate requests stop cold. One day everything works. The next, you see rate-limit errors and wonder what happened.
Here’s the thing. Let’s Encrypt secures over 350 million websites with free SSL. To keep things stable and safe, they enforce strict rate limits. These limits can surprise even seasoned developers. They bite hardest when securing many domains or subdomains at once.
Understanding these limits prevents headaches. It also keeps your sites secure and your business running. I’ll explain what the limits mean. I’ll share five practical steps to avoid SSL issues before they happen.
What Are Let’s Encrypt Rate Limits?
Think of Let’s Encrypt rate limits like a busy restaurant. It can serve only so many guests each hour. They are not there to hassle you. They ensure fair access and protect the system.
The key limit is 50 certificates per registered domain every 7 days. “Registered domain” means your eTLD+1, or main domain. If you own example.com, all subdomains share that weekly pool. That includes www, blog, and shop subdomains.
That’s not the only limit. You get 5 failed validation attempts per domain per hour. Repeated failures trigger a temporary lockout. Common causes include DNS or firewall issues. There’s also a duplicate certificate limit of 5 per week. Renewals do not count against the 50-certificate quota.
Account creation is limited too: 10 accounts per IP every 3 hours. This prevents abuse through mass accounts. It can also affect legitimate teams that need several accounts.
Step 1: Use Wildcard Certificates for Multiple Subdomains
Here’s your first defense against rate limits. Use a single wildcard certificate, not many subdomain certificates. One wildcard covers all subdomains under your domain.
A wildcard for *.example.com secures www, blog, shop, and new subdomains. You issue only one certificate. This slashes issuance volume and stays within Let’s Encrypt limits.
Even better, a single certificate can list up to 100 domains. Managing many brands? Combine domains into fewer certificates. One cert can cover yourcompany.com, .net, and .org.
Look at your setup. Are you requesting one certificate per subdomain? If so, you burn limits quickly. Switching to wildcard certificates is often the top fix.
Step 2: Test in the Staging Environment First
Before deploying live, test in Let’s Encrypt’s staging environment. It’s a safe practice kitchen. Mistakes don’t affect customers.
Staging has relaxed limits: 50 new registrations per IP per 3 hours. Production allows only 10. Use staging to test SSL, fix DNS, and refine deployment.
Many teams skip this step in a rush to go live. That’s when rate-limit problems strike. You issue, it fails, you retry, and hit five failures. Now you must wait.
Follow this rule. Do not issue a production certificate until staging succeeds. Spend 15 extra minutes. It could save days later.
Step 3: Implement Protective Safeguards
Smart hosting platforms add safeguards to prevent runaway certificate requests. You should do the same.
Many platforms lock SSL provisioning after three failures. They stop before Let’s Encrypt’s limit of five. That buffer prevents retry loops and protects weekly limits.
If you manage SSL yourself, add similar safeguards. Monitor requests per domain and per week. Create alerts near the limits. Add automatic delays between retries.
Do not rely on manual steps. SSL issues feel urgent, and pressure creates mistakes. Automation removes human error in Let’s Encrypt rate-limit management.
Step 4: Monitor and Space Out Certificate Requests
If you manage many sites or a SaaS, timing matters. Be strategic with certificate requests. Avoid securing everything at once.
Let’s Encrypt allows 10 certificates per IP every three hours. Migrating dozens at once? Pace your requests. Spread them over days, not one afternoon.
Keep detailed logs of issuance times and domains. This is essential for weekly limits. Know exact counts for each domain over seven days before requesting more.
Use a spreadsheet or database to track issuance dates, renewals, and limit usage. Seeing requests visually helps avoid accidental Let’s Encrypt limit hits.
Step 5: Fix Root Causes Before Retrying Failed Requests
This might be the most important step. When provisioning fails, do not retry immediately. The seven-day window also tracks failed attempts per domain.
Instead, find and fix the root cause. Common causes include DNS mistakes, blocked HTTP validation, or domain verification issues. Retrying without fixes only wastes your limits.
Some common issues to check when certificates fail:
- DNS records pointing to the correct IP address
- Firewall rules allowing HTTP validation on port 80
- Web server configuration properly handling validation requests
- Domain ownership verification working correctly
Follow this rule of thumb. Wait at least an hour between failures. Do not retry until you fix the specific problem. Many providers recommend this. It prevents accidental lockouts.
What Happens When You Hit Rate Limits
Despite your best efforts, you may still hit limits. When it happens, wait for the window to reset. The main certificate limit resets after seven days.
While you wait, consider alternatives. Issue wildcard certificates where missing. Consolidate domains into fewer certificates. For critical needs, consider a commercial CA as a temporary last resort.
Most important, learn from the incident. Review what happened. Update processes to prevent repeats. Confirm your safeguards work properly.
Remember, Let’s Encrypt rate limits keep the service stable for everyone. Follow the five steps. Use wildcards. Test in staging. Add safeguards. Monitor usage. Fix root causes early.
The key is proactive planning, not reactive troubleshooting. With preparation, you can keep sites secure without hitting these limits.


by Charles Oropallo | Sep 27, 2024 | Do-It-Yourself, Technical Help, The CW Corner, Web Hosting, WordPress
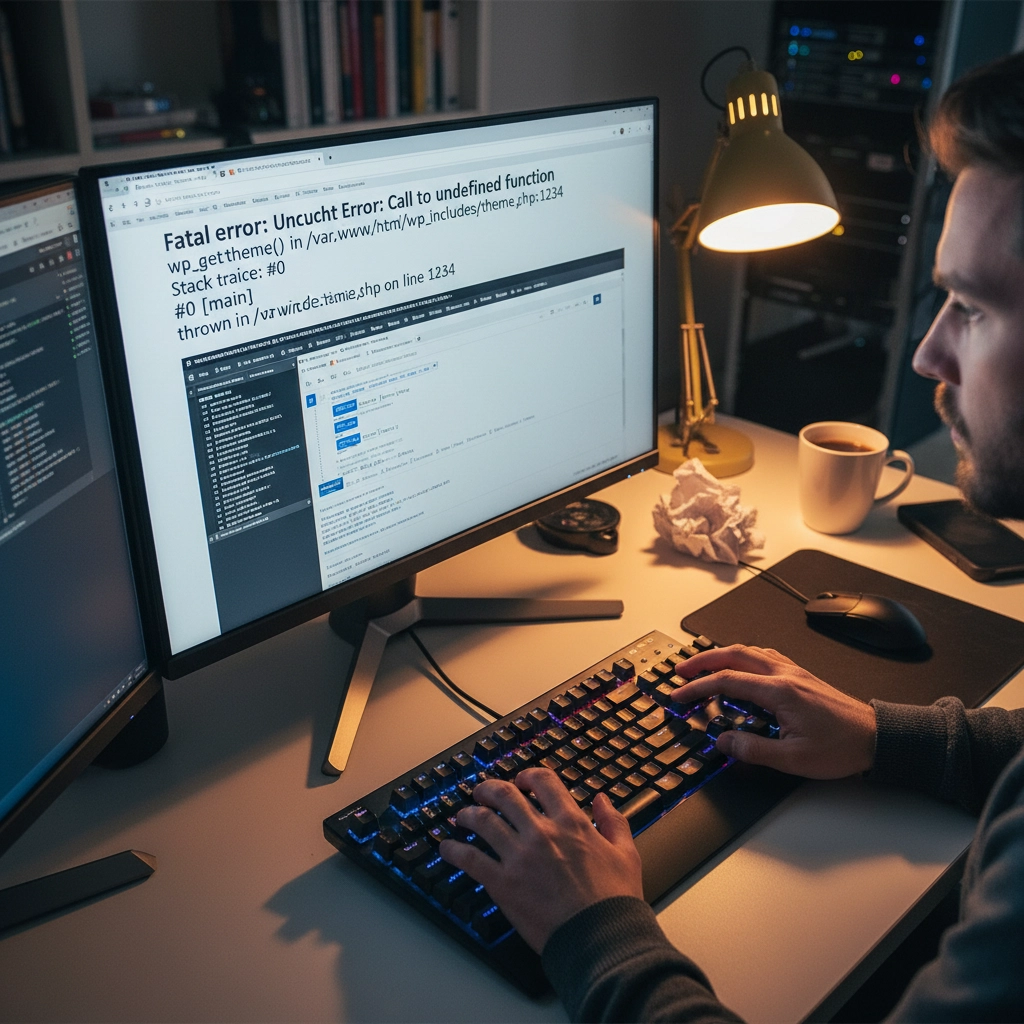
You updated PHP on your hosting account and suddenly your WordPress site displays a white screen or error messages. Sound familiar? You’re not alone. PHP updates break WordPress sites more often than you’d think, but the good news is that most issues have straightforward fixes.
The problem usually stems from outdated plugins, themes, or even WordPress core files that aren’t compatible with newer PHP versions. Think of it like trying to run old software on a brand-new computer – sometimes it just doesn’t work without updates.
Don’t panic. Here’s your step-by-step recovery plan to get your site back online and properly updated.
Step 1: Revert PHP Version Immediately
Your first priority is getting your site back online. Log into your hosting control panel (like cPanel) and find the PHP settings. This might be called “MultiPHP Manager,” “PHP Version,” or “Select PHP Version.”
Switch back to your previous PHP version – usually PHP 7.4 or 8.0. Your site should come back online within minutes. This buys you time to properly diagnose and fix the underlying compatibility issues.
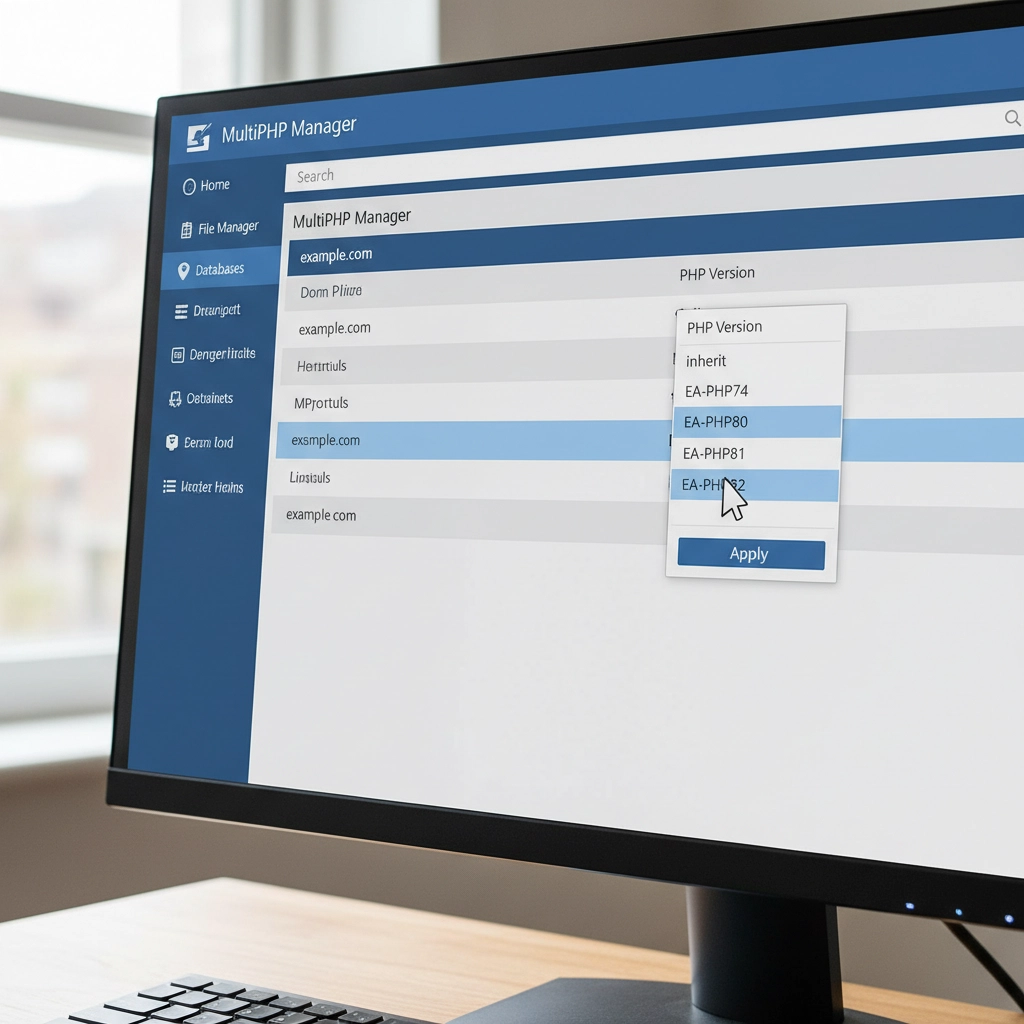
Remember, this is a temporary fix. Running outdated PHP versions leaves your site vulnerable to security threats. PHP 7.4 stopped receiving security updates in November 2022, and even PHP 8.0 support ended in November 2023.
Step 2: Create a Full Site Backup
Before making any changes, backup everything. Use a plugin like UpdraftPlus or your hosting provider’s backup tool. You need both your website files and database.
Think of this as insurance. If something goes wrong during the update process, you can restore your site to its current working state. Many hosting providers offer one-click backups through their control panels.
Don’t skip this step. I’ve seen too many sites get worse instead of better because someone tried to fix things without a safety net.
Step 3: Update WordPress Core, Themes, and Plugins
Head to your WordPress dashboard and navigate to Updates. Install all pending updates for WordPress core, your active theme, and plugins. Newer versions often include compatibility patches for recent PHP versions.
Pay special attention to plugins you haven’t updated in months or years. Abandoned plugins are the biggest culprits in PHP compatibility issues. If you see plugins that haven’t been updated in over two years, consider finding alternatives.
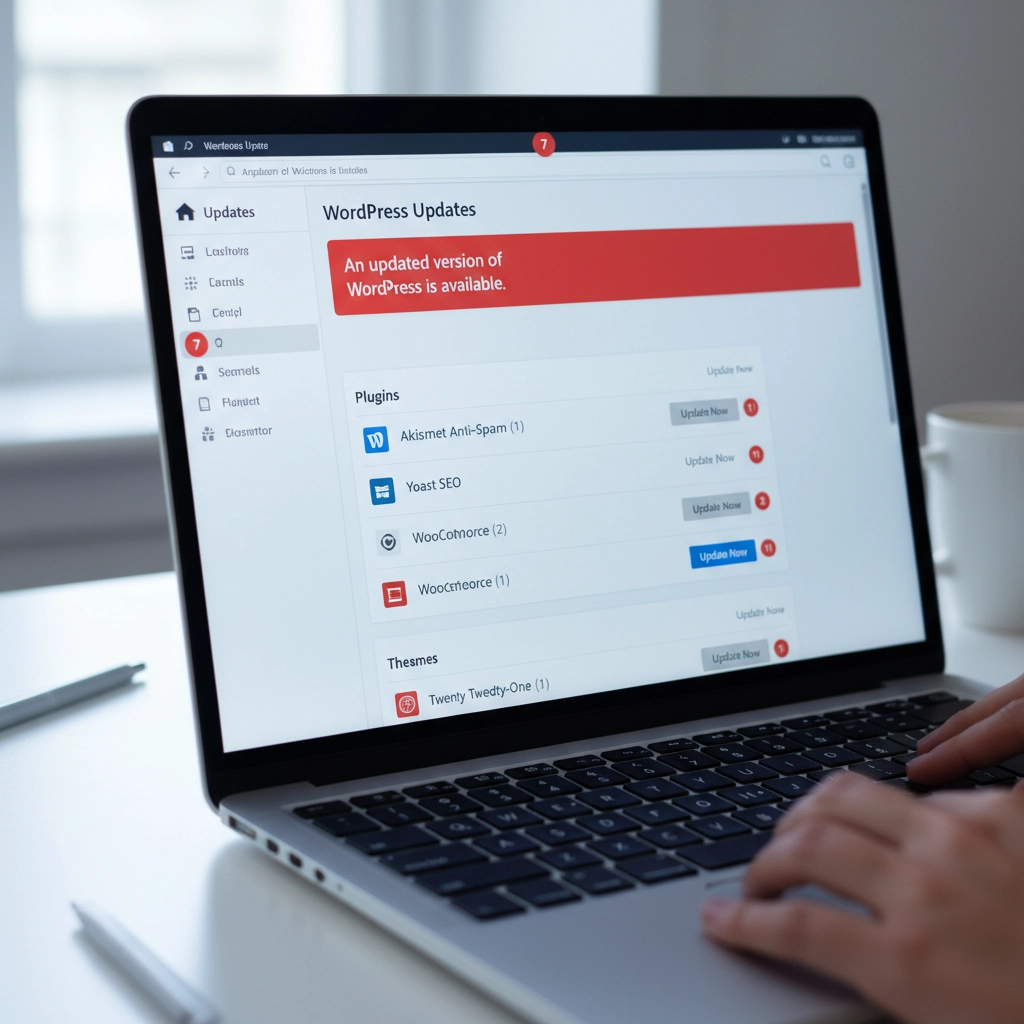
Update your active theme too. Custom themes from developers who no longer provide support can be particularly problematic. If your theme hasn’t been updated recently, contact the developer or consider switching to a well-maintained alternative.
Step 4: Run a PHP Compatibility Check
Install the PHP Compatibility Checker plugin by WP Engine. This free tool scans your entire site and generates a report showing which themes and plugins won’t work with newer PHP versions.
Run a scan targeting your desired PHP version (usually PHP 8.1 or 8.2). The report will flag specific files and functions that need attention. This gives you a roadmap for what needs fixing before you can safely update PHP.
The scan might take several minutes depending on your site size. Don’t close your browser tab while it’s running. The detailed report will show you exactly which plugins or themes are causing problems.
Step 5: Test in a Staging Environment
If your hosting provider offers staging sites, use one. Create a copy of your live site where you can safely test the PHP update without affecting visitors.
Apply the PHP update to your staging site first. If everything works correctly there, you can confidently update your live site. If problems occur, you can troubleshoot without any downtime.
Many hosts include staging tools in their control panels. WordPress.com, WP Engine, and SiteGround all offer easy staging environments. Some plugins like WP Staging can create staging sites on any host.

Step 6: Isolate Problematic Components
If your site still breaks after updating everything, you need to identify the specific culprit. Start by deactivating all plugins and switching to a default WordPress theme like Twenty Twenty-Four.
Try the PHP update again. If your site works with all plugins disabled and the default theme active, you know the problem is with a plugin or your theme.
Reactivate plugins one by one, testing your site after each activation. When your site breaks, you’ve found the problematic plugin. Do the same process with your theme by switching back to it after testing all plugins.
Step 7: Handle Incompatible Extensions
Found the troublemaker? You have several options. First, check if there’s a newer version available. Plugin developers often release compatibility updates shortly after new PHP versions.
If no update exists, look for alternative plugins that provide the same functionality. The WordPress plugin directory has thousands of options, and newer plugins typically support current PHP versions.
For premium plugins or themes, contact the developer directly. Many offer compatibility updates for paying customers even if they haven’t released public updates.
Sometimes you might need to hire a developer to update custom code or modify a theme. This is especially common with heavily customized sites or older premium themes.
Step 8: Reapply the PHP Update
Once you’ve resolved all compatibility issues, it’s time to update PHP again. Go back to your hosting control panel and select your target PHP version.
Most sites work well with PHP 8.1 or 8.2. These versions offer significant performance improvements over older versions. WordPress officially supports PHP 8.0 and higher, with PHP 8.1 being the recommended version.
Apply the change and test your site thoroughly. Check your homepage, admin area, contact forms, and any special functionality like e-commerce checkout processes.
Step 9: Post-Update Monitoring
After updating PHP, monitor your site closely for the first few days. Clear all caches – server-level caches, plugin caches, and your browser cache.
Check your hosting control panel’s error logs for any PHP errors or warnings. Look for the “Error Logs” section in cPanel or similar tools in other hosting panels. WordPress also creates debug logs if you enable debugging in wp-config.php.
Set up website monitoring tools to alert you if your site goes down. Services like UptimeRobot or Pingdom can send email alerts when problems occur.
Prevention Tips for Future Updates
Stay proactive with updates. Install WordPress, theme, and plugin updates regularly instead of letting them accumulate. Regular small updates are much safer than jumping multiple versions at once.
Remove unused plugins and themes. Every piece of code on your site is a potential compatibility problem. If you’re not actively using a plugin, delete it completely.
Consider managed WordPress hosting. Companies like WP Engine, Kinsta, and Pressable handle PHP updates more carefully, often testing compatibility before applying updates to your site.
When to Get Professional Help
Some situations require expert assistance. If you’re running a mission-critical e-commerce site, have heavily customized code, or feel overwhelmed by the technical steps, consider hiring a WordPress professional.
Custom-built themes and plugins often need developer attention for PHP compatibility. The cost of professional help is usually much less than the revenue lost from extended downtime.
Don’t let pride keep your site broken. Sometimes the smartest move is admitting you need help and getting your site fixed quickly and correctly.
Your WordPress site doesn’t have to break every time PHP updates. With proper preparation and systematic troubleshooting, you can keep your site running smoothly on current, secure PHP versions. The key is taking it step by step and not rushing the process.
by Charles Oropallo | Aug 23, 2024 | Do-It-Yourself, Security, Technical Help, The CW Corner, WordPress
WordPress powers over 40% of all websites on the internet. That popularity makes it a prime target for hackers. Every day, thousands of WordPress sites get compromised because owners make simple security mistakes.
The good news? Most of these mistakes are easy to fix. You don’t need to be a security expert to protect your website. You just need to know what you’re doing wrong and how to fix it.
Let’s dive into the seven biggest WordPress security mistakes and their solutions.
Mistake #1: Ignoring Updates (The Silent Site Killer)
Here’s the harsh truth: 97% of WordPress security problems come from plugins. Yet only 30% of WordPress users have auto-updates enabled.
Think about it this way. When developers find a security hole, they release an update to fix it. The longer you wait to update, the more time hackers have to exploit that known weakness.
How to Fix It:
Enable automatic updates for WordPress core, plugins, and themes. Most hosting providers offer this feature in their control panels. If yours doesn’t, consider switching to a managed WordPress host.
Check your plugins weekly. Delete any you’re not using. Inactive plugins can still be exploited by hackers.
Set calendar reminders if auto-updates aren’t available. Manual updates beat no updates every time.
Pro Tip: Create a staging site to test updates before they go live. This prevents your main site from breaking during updates.
Mistake #2: Using Weak Passwords and Predictable Usernames
“admin” with password “password123” isn’t clever. It’s dangerous. 41% of WordPress users still use weak passwords or skip two-factor authentication entirely.
Hackers use bots that test thousands of password combinations per minute. A weak password like “ADMIN123” gets cracked in seconds.
How to Fix It:
Create strong passwords with at least 12 characters. Mix uppercase, lowercase, numbers, and special characters.
Never use “admin” as your username. Choose something unique that doesn’t relate to your business name.
Use a password manager like 1Password or Bitwarden. They generate complex passwords and store them securely.
Change default usernames immediately. If you already have an “admin” account, create a new administrator account with a different username, then delete the old one.
Quick Check: Can you guess your password by looking at your keyboard or personal information? If yes, change it now.
Mistake #3: Skipping Two-Factor Authentication (Your Security Backup Plan)
Passwords alone aren’t enough anymore. Even strong passwords can be compromised through data breaches or phishing attacks.
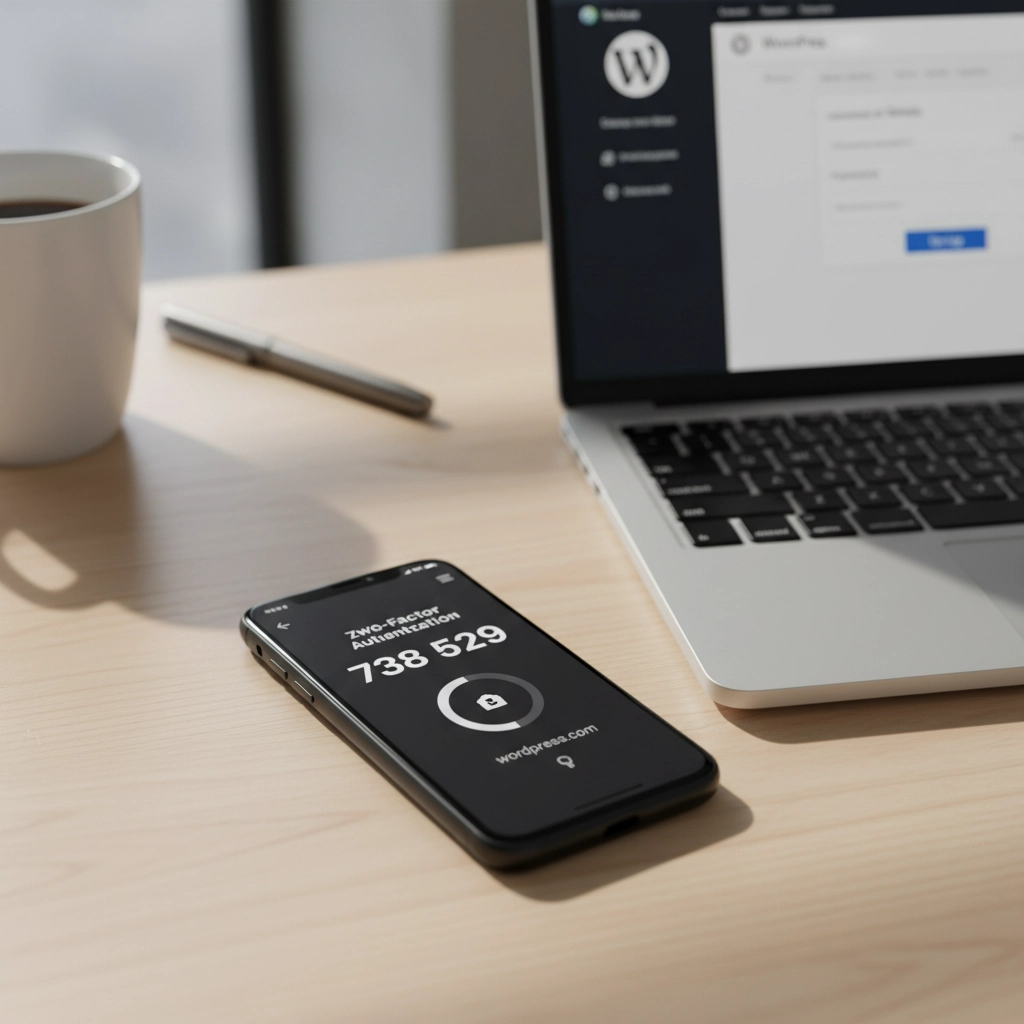
Two-Factor Authentication (2FA) adds a second layer of protection. Even if hackers get your password, they still need your phone or authentication app to get in.
How to Fix It:
Install a 2FA plugin like Wordfence or Google Authenticator for WordPress.
Set up 2FA for all user accounts, especially administrators and editors.
Use an authenticator app instead of SMS when possible. Apps like Google Authenticator or Authy are more secure than text messages.
Test your 2FA setup regularly. Make sure you can access backup codes if you lose your phone.
Remember: 2FA might seem inconvenient, but it’s much less inconvenient than rebuilding your hacked website.
Mistake #4: Forgetting to Back Up Your Website
“My hosting company handles backups.” Famous last words from website owners who lost everything.
Hosting backups might not include all your files. They might be stored on the same server that gets hacked. Or they might be overwritten before you realize you need them.
How to Fix It:
Set up automated daily backups that include your entire website and database.
Store backups in multiple locations. Use cloud services like Google Drive, Dropbox, or Amazon S3.
Test your backup restoration process monthly. A backup that doesn’t restore is useless.
Keep at least 30 days of backup history. Sometimes you don’t notice problems immediately.
Use plugins like UpdraftPlus or BackWPup for automated scheduling.
Reality Check: When did you last check if your backups actually work? If you can’t answer that, check today.
Mistake #5: Installing Themes and Plugins from Sketchy Sources
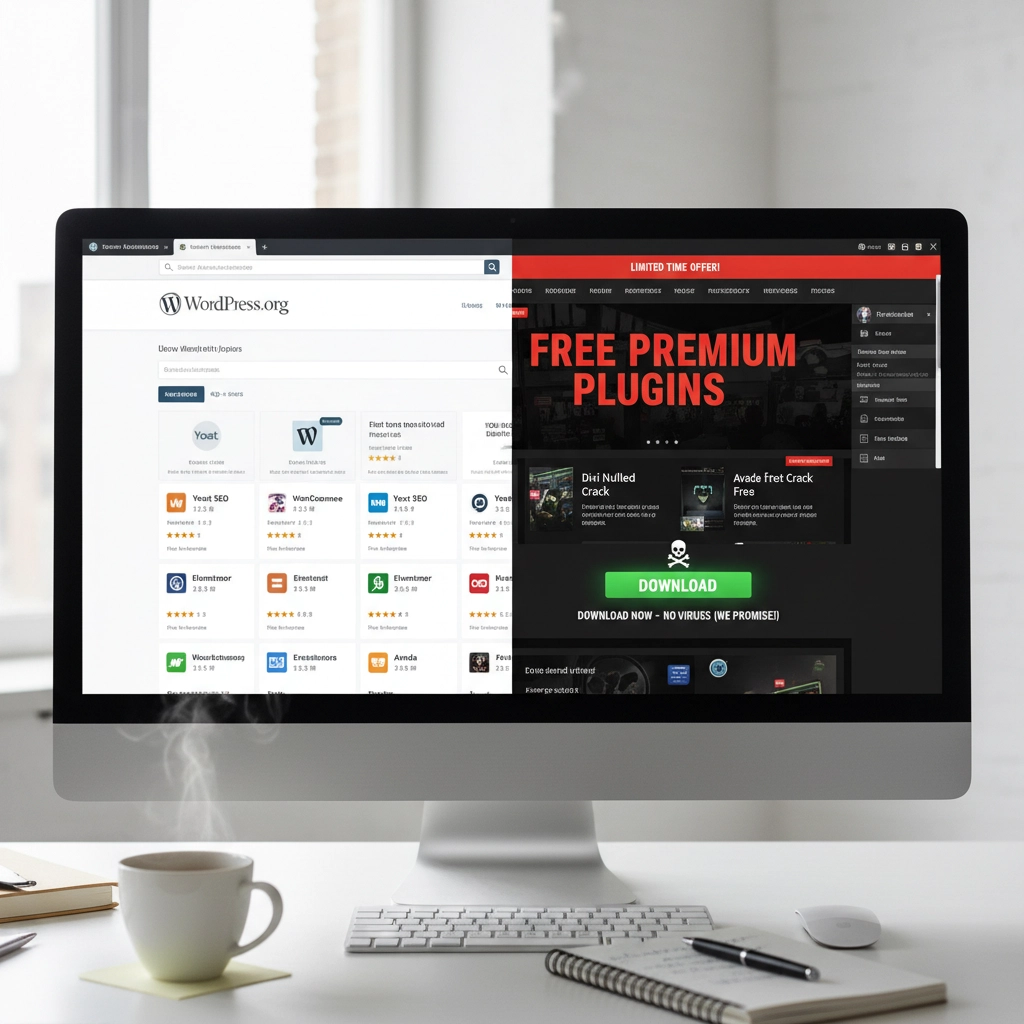
Free premium themes and plugins sound tempting. But they often come with hidden malware or backdoors that give hackers access to your site.
Even legitimate-looking themes can contain malicious code that steals user data or redirects visitors to scam sites.
How to Fix It:
Only download themes and plugins from the official WordPress repository or established developers.
Check ratings and reviews before installing anything. Look for recent updates and active support.
Research the developer. Do they have other plugins? A professional website? Good reviews?
Scan new themes and plugins with security tools before activation.
Delete unused plugins immediately. Don’t just deactivate them: remove them completely.
Warning Sign: If a “premium” theme or plugin is offered free on a random website, it’s probably infected with malware.
Mistake #6: Ignoring File Permissions (The Technical Blind Spot)
File permissions control who can access what on your server. Wrong permissions can let hackers read sensitive files or upload malicious code.
Most WordPress users never check their file permissions. They assume their hosting provider set them correctly. That’s a dangerous assumption.
How to Fix It:
Set correct file permissions: 755 for directories and 644 for files.
Never use 777 permissions unless absolutely necessary (and change them back immediately after).
Protect your wp-config.php file with 600 permissions.
Work with your hosting provider to audit permissions if you’re unsure.
Use security plugins that monitor and alert you about permission changes.
Technical Note: If file permissions sound too complex, ask your web developer or hosting support to check them for you.
Mistake #7: No Security Monitoring (Flying Blind)
Many WordPress owners only discover they’ve been hacked when visitors complain or Google flags their site. By then, the damage is done.
Hackers often work silently, stealing data or using your site to attack others. You need active monitoring to catch problems early.

How to Fix It:
Install security monitoring plugins like Wordfence, Sucuri, or iThemes Security.
Set up email alerts for suspicious login attempts, file changes, or malware detection.
Monitor your website traffic for unusual spikes or patterns.
Check your site regularly from different devices and browsers.
Use Google Search Console to monitor for security warnings.
Pro Tip: Set up uptime monitoring to alert you immediately if your site goes down. Services like UptimeRobot offer free basic monitoring.
Taking Action: Your Security Checklist
Security isn’t a one-time task. It’s an ongoing process. Here’s your priority order for fixing these mistakes:
- Enable automatic updates immediately – This fixes your biggest vulnerability right now
- Change weak passwords and usernames – Use a password manager to make this easy
- Set up 2FA on all accounts – Add that crucial second layer of protection
- Configure automated backups – Your safety net for when things go wrong
- Audit your plugins and themes – Remove anything suspicious or unused
- Check file permissions – Get help if this feels too technical
- Install security monitoring – Your early warning system
Don’t try to fix everything at once. Start with automatic updates and work down the list. Each step makes your site significantly more secure.
Remember: The best time to secure your WordPress site was yesterday. The second-best time is right now.
Need help implementing these security measures? Our team specializes in WordPress security and can audit your site for vulnerabilities. Contact us for a security consultation that could save your website from becoming another hacking statistic.
by Charles Oropallo | Feb 27, 2024 | Do-It-Yourself, Security, Technical Help, The CW Corner, WordPress

Think your WordPress site is secure? You might be shocked to learn that 97% of WordPress security problems stem from plugin vulnerabilities alone. Even worse, hackers know exactly which mistakes you’re making, and they’re counting on you to keep making them.
Don’t panic. Most WordPress security breaches happen because site owners unknowingly leave the digital equivalent of their front door wide open. The good news? These mistakes are completely preventable once you know what to look for.
Let’s dive into the seven most dangerous security mistakes that make your WordPress site an easy target for cybercriminals.
1. Running Outdated or Inactive Plugins
Here’s a scary statistic: only 30% of WordPress users have auto-updates enabled on their websites. That means 70% are sitting ducks for hackers who specifically target outdated plugins.

How Hackers Exploit This: Cybercriminals use automated scanning tools that crawl the web looking for sites running vulnerable plugin versions. When they find one, they already have the exploit code ready to go. It’s like leaving your house key under the doormat with a sign pointing to it.
Take the 2023 vulnerabilities in WP Fastest Cache and Essential Add-ons for Elementor. Thousands of websites running outdated versions became instant targets. Hackers didn’t need to be clever, they just needed to find sites that hadn’t updated.
The Fix: Enable automatic updates for plugins whenever possible. If you prefer manual control, check for updates weekly. More importantly, delete any plugins you’re not actively using. Inactive plugins are still attack vectors that hackers love to exploit.
2. Using Weak Passwords and Skipping Two-Factor Authentication
Here’s a reality check: 41% of WordPress users don’t use strong passwords or two-factor authentication (2FA). If your admin password is “password123” or your business name plus the year, you’re basically sending hackers an invitation.
How Hackers Exploit This: Brute force attacks are the digital equivalent of trying every key until one opens the lock. Hackers use bots that attempt thousands of login combinations per minute. Since WordPress allows unlimited login attempts by default, these bots can run 24/7 until they crack your password.
Once they’re in, they own your site. Customer data, financial information, email addresses, everything becomes theirs to sell or exploit.
The Fix: Use passwords that are at least 12 characters long with a mix of letters, numbers, and symbols. Better yet, use a password manager to generate unique passwords for every account. Enable 2FA immediately, Google’s research shows it stops 100% of automated bot attacks.
3. Installing Plugins and Themes from Sketchy Sources
Free premium themes and plugins sound tempting, right? Those “nulled” versions of expensive plugins seem like a steal. Here’s the truth: if something seems too good to be true, it probably contains malware.
How Hackers Exploit This: Malicious developers embed backdoors directly into these “free” premium plugins. The moment you install them, hackers have a secret entrance to your site. Some plugin viruses are designed to automatically infect every other plugin and theme on your installation, spreading like wildfire through your entire WordPress setup.
These backdoors often go undetected for months, giving hackers plenty of time to steal data, inject spam links, or use your server for cryptocurrency mining.
The Fix: Stick to plugins and themes from WordPress.org, reputable commercial developers, or well-established marketplaces. Yes, you might pay more upfront, but it’s infinitely cheaper than dealing with a hacked website.
4. Ignoring File Permissions
File permissions might sound technical, but they’re basically your site’s security guard. When configured incorrectly, they’re like having a security guard who lets anyone walk into your building.
How Hackers Exploit This: Loose file permissions allow attackers to access sensitive files they shouldn’t see. Once they have limited access, they can often escalate their privileges and gain control of critical system files. It’s like giving someone permission to use your bathroom, and they end up with keys to your entire house.
With proper access, hackers can modify your site’s code, steal database information, or install persistent backdoors that survive even when you clean up other security issues.
The Fix: Follow the principle of least privilege. Files should be set to 644 permissions, directories to 755. Your wp-config.php file should be 600. If these numbers look like gibberish, ask your hosting provider to audit your file permissions.
5. Procrastinating on WordPress Updates
Those update notifications aren’t suggestions: they’re security bulletins. Every WordPress update includes patches for newly discovered vulnerabilities. When you ignore them, you’re essentially leaving known security holes open for hackers to exploit.
How Hackers Exploit This: WordPress developers openly publish what each security update fixes. This creates a roadmap for hackers who can easily identify which sites haven’t updated and target the specific vulnerabilities that remain unpatched.
It’s like fixing a broken lock on your front door but announcing to the neighborhood exactly when the repair will happen. Unpatched sites become obvious targets.
The Fix: Update WordPress core, plugins, and themes as soon as updates become available. Schedule a weekly maintenance window to check for and install updates. Most hosting providers offer staging environments where you can test updates before applying them to your live site.
6. Skipping Backups and Security Monitoring
Not having backups is like driving without insurance: you’ll only realize how crucial it is when disaster strikes. Similarly, running a WordPress site without security monitoring is like closing your eyes and hoping nothing bad happens.
How Hackers Exploit This: Without backups, when (not if) your site gets compromised, you have no clean version to restore. Hackers know this, which is why some attacks are designed to corrupt or encrypt your existing files, leaving you with no recovery options.

Without security monitoring, attacks can run undetected for weeks or months. During this time, hackers can steal customer data, inject malicious code, or use your site to attack other websites.
The Fix: Set up automated daily backups stored off-site (not on the same server as your website). Install a security plugin that monitors file changes, login attempts, and suspicious activity. For critical business sites, consider our email security services that include comprehensive monitoring.
7. Installing Software from Unknown Repositories
This mistake often flies under the radar but can be the most dangerous. Installing plugins or themes from forums, random websites, or commercial repositories outside the WordPress ecosystem introduces unknown code into your installation.
How Hackers Exploit This: Unlike WordPress.org plugins that undergo community scrutiny, third-party sources may lack any security review process. These repositories are often intentionally compromised or simply don’t have the resources to properly vet code.
Hackers exploit this by creating legitimate-looking plugins or themes that contain hidden malware. Once installed, these give attackers automatic access to your site without needing to break in through other methods.
The Fix: Stick to WordPress.org for free plugins and themes. For premium options, buy directly from the developer or established marketplaces like CodeCanyon. Never download “nulled” versions of paid plugins: they’re almost always infected with malware.
Your Next Steps
WordPress security isn’t rocket science, but it does require consistent attention. Start by auditing your current setup against these seven mistakes. Update everything, remove unused plugins, strengthen your passwords, and enable 2FA.
Remember, hackers are counting on you to make these mistakes. Don’t give them the satisfaction. A few hours of security maintenance now can save you weeks of cleanup later: not to mention the potential loss of business and customer trust.
Need help securing your WordPress site? We specialize in helping businesses protect their digital assets without the technical headaches. Your website is too important to leave to chance.
by Charles Oropallo | Jan 3, 2021 | Do-It-Yourself, Technical Help, The CW Corner, Website Development, WordPress
I wanted to create a custom HTML code function, so made one that will generate a line feed. I tested it to neaten up the output from my favorite WordPress statistics plugin: WP-Statistics by Verona Labs.
This shortcode gives the ability to add line feeds to WordPress page, post or report outputs to improve their readability. The function can easily be modified to generate any HTML output by doing this:
- rename “newline” in the “add_shortcode” line to whatever you’d like the shortcode to be named
- adjust the HTML code inside the quotes in the “return” line
In this example, we’ll create the line break shortcode.
Creating the Line Break Shortcode
Adding shortcodes in WordPress is easily accomplished by simply inserting the appropriate coding for the shortcode into your child theme’s functions.php file.
Note: Child themes should always be used. Changes made directly to the parent theme’s files are usually overwritten each time the parent theme is updated.
To add the code, first back up your site and then do the following:
- Log into the WordPress Dashboard as an administrator
- Navigate to Appearance > Theme Editor
- Select Theme Functions (functions.php) under Theme Files in the right column
- Add the short function code lines below
/* -- Start of line breaks shortcode --*/
function line_break_shortcode() {
return '<br />';
}
add_shortcode( 'newline', 'line_break_shortcode' );
/* -- End of line break shortcode --*/
Adding Line Breaks
Once the code has been added to your functions.php file, all you have to do is add the
shortcode in your text to generate a line feed at that point. The beauty of doing this as a shortcode is that it can be inserted in places that do not normally allow you to add them – like in the email output of the WP-Statistics plugin.
Note: When testing your output from the WP-Statistics plugin, there is a convenient feature that allows you to send output every minute to see what you will be sending. As a rule I normally have the report set to send daily.
A Working Example
There were a couple of WP-Statistics report items that were of particular interest to me. One is the last post date. This is handy as a reminder when one should add one or more posts to a site – especially a blog – so the site content doesn’t appear stale (or as an alternative, simply do not show blog post creation dates). Even if you are not displaying the post dates on the site, it is good to know when you last posted something.
An example of the report pattern I used was this (note that in some WordPress themes the “[” and “]” characters in the example below display as repeated – there should only be one “[” opening shortcode character and one “]” closing shortcode character surrounding the shortcode itself when you use it):
WP Statistics report for https://CWCorner.com WordPress site:
[newline]
_______________________________________________
[newline]
[newline]
Last post date: [[wpstatistics stat=lpd]]
[newline]
Total Site Posts: [[wpstatistics stat=postcount]]
[newline]
Total Site Pages: [[wpstatistics stat=pagecount]]
[newline]
Total Site Users: [[wpstatistics stat=usercount]]
[newline]
Online Users at Report Time: [[wpstatistics stat=usersonline]]
[newline]
_______________________________________________
[newline]
[newline]
Today's Visitors so far: [[wpstatistics stat=visitors time=today]]
[newline]
Today's Visits so far: [[wpstatistics stat=visits time=today]]
[newline]
Yesterday's Visitors: [[wpstatistics stat=visitors time=yesterday]]
[newline]
Yesterday's Visits: [[wpstatistics stat=visits time=yesterday]]
[newline]
_______________________________________________
[newline]
[newline]
Total Visitors: [[wpstatistics stat=visitors time=total]]
[newline]
Total Visits: [[wpstatistics stat=visits time=total]]
[newline]
_______________________________________________
[newline]
[newline]
End of WP Statistics Report.
[newline]
I used the underline characters to separate various parts of the output for clarity. This report pattern generated a nicer, more readable report that even looked great when viewing it on my cell phone.
While I initially added this function as a way to neaten up the output of the WP-Statistics email report – the function should work just about anyplace in WordPress except in the PHP coding itself.
by Charles Oropallo | Dec 15, 2020 | Do-It-Yourself, Internet, Security, Technical Help, The CW Corner, Website Development, WordPress
Akismet provides a convenient and free way to protect your personal WordPress site or blog from spam.
Many times we’d like to allow comments to be left on our WordPress site. The hassle with this can be the tremendous amounts of spam that come through the forms on websites.
Akismet is a compact WordPress plugin that filters the incoming comments. It is pretty straightforward to use and pretty easy to set up as well.
Install the Akismet plugin
The first step in this process is to ensure that the Akismet plugin is installed in your WordPress website:
-
-
- Log into your WordPress website’s dashboard as an administrator
- Click on Plugins in the left dashboard navigation column
- Look and see if Akismet is listed – if it is – and it is not activated you can proceed to the Akismet Setup step below – otherwise
- Click on Add New under Plugins in the dashboard navigation column
- If you don’t see Akismet in the plugins, then in the text box to the right of the work Keyword in the row starting with Featured type in Akismet – then click on its Install Now button. Do not activate it yet.
Perform the Akismet Setup
To set up Akismet in your website, you will need an API code from the Akismet site. The first step in that process is to navigate to:
https://akismet.com/plans
This (as of the time of this writing) brings you to a page that should look similar to the screenshot below.
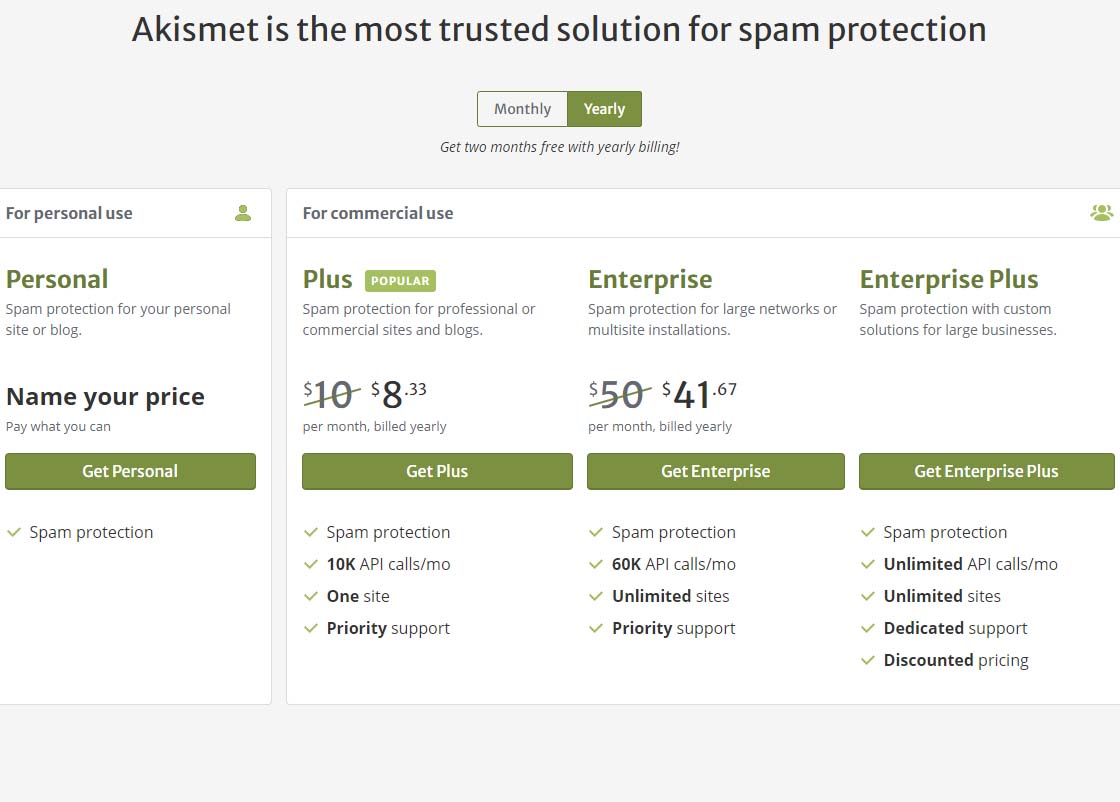 Akismet offering pricing page
To get the free version of Akismet comment spam protection, you will need to click on the Get Personal button on the above page.
Once you’ve done that, you should see a page similar to the one below. Before attempting to fill out anything on this page, we need to set that $36 / YEAR to $0 / YEAR. Click on the $36 / YEAR box and drag it to the left.
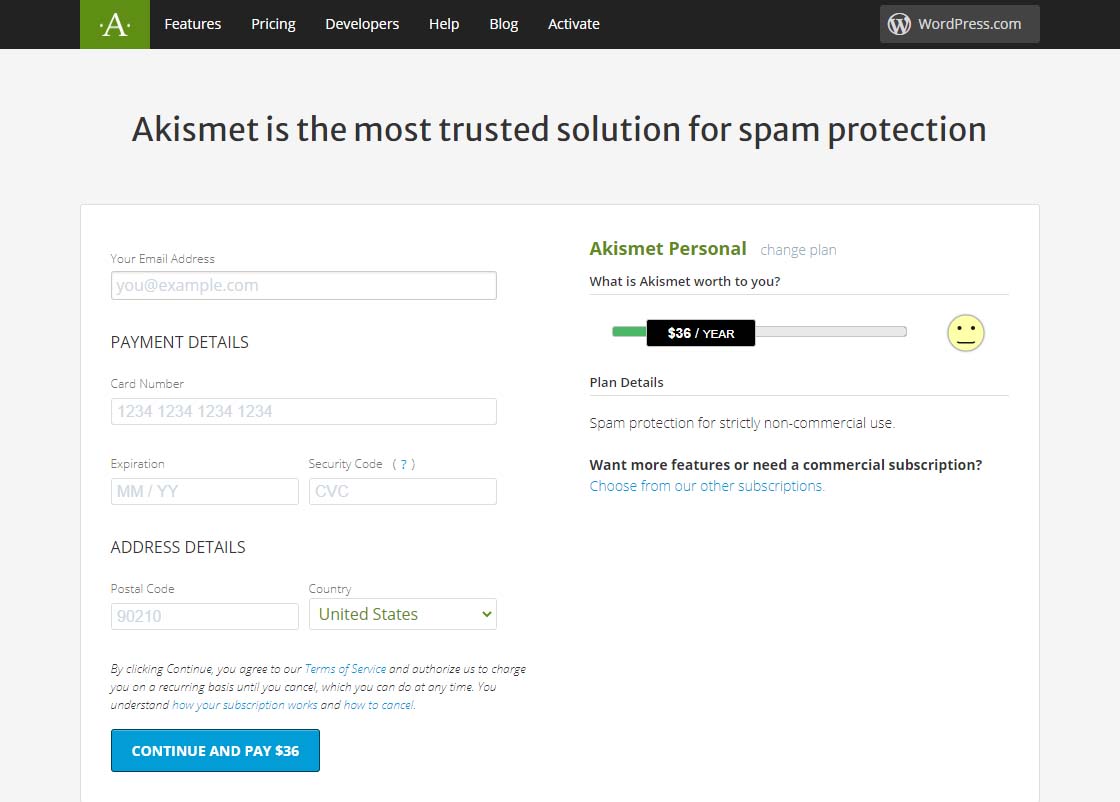 Akismet Default $36 per year page
Dragging that $36 / YEAR box to the left should change the page to display something like the one below showing 0$ / YEAR. You can also see that the information to fill in has changed.
Akismet $0 per year page
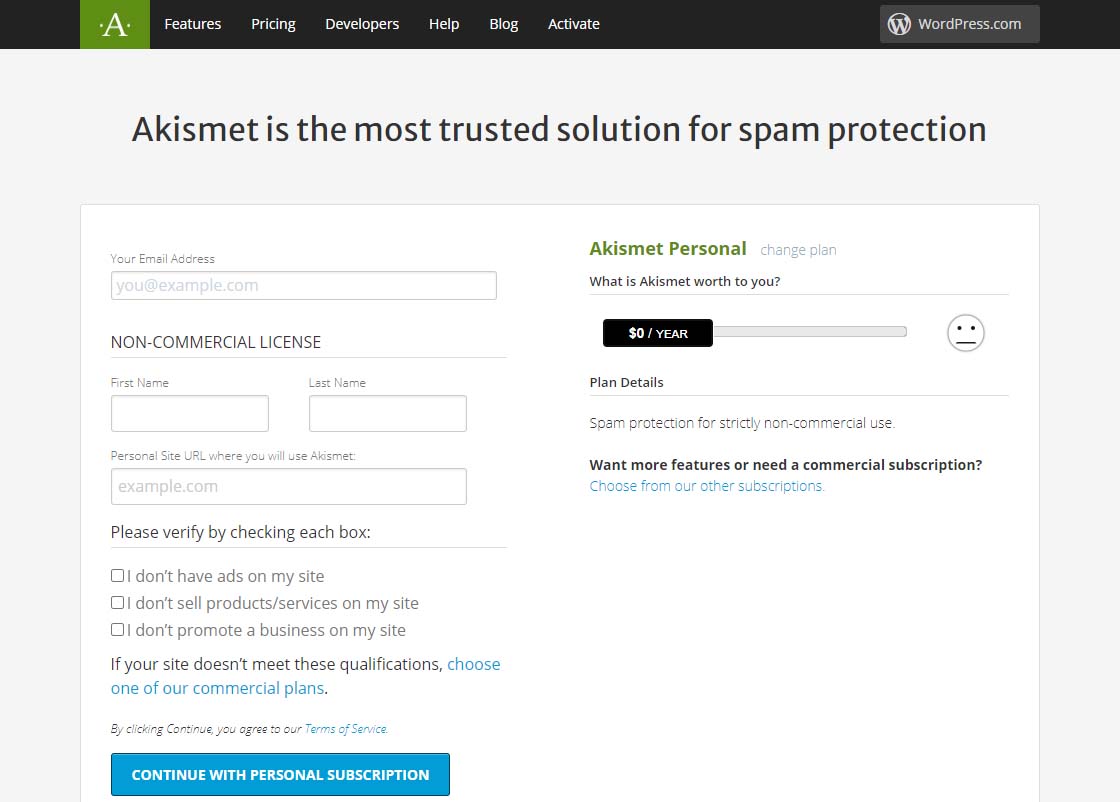 Akismet $0 per year page
Now fill in the information completely. Note that you need to be able to check all three checkboxes indicating the following:
-
-
- you don’t have ads on your site
- you don’t sell products/services on your site
- you don’t promote a business on your site
If these are the case, then you will qualify for a free, personal plan.
All you have to do once you have gotten this far is follow the directions on the page below.
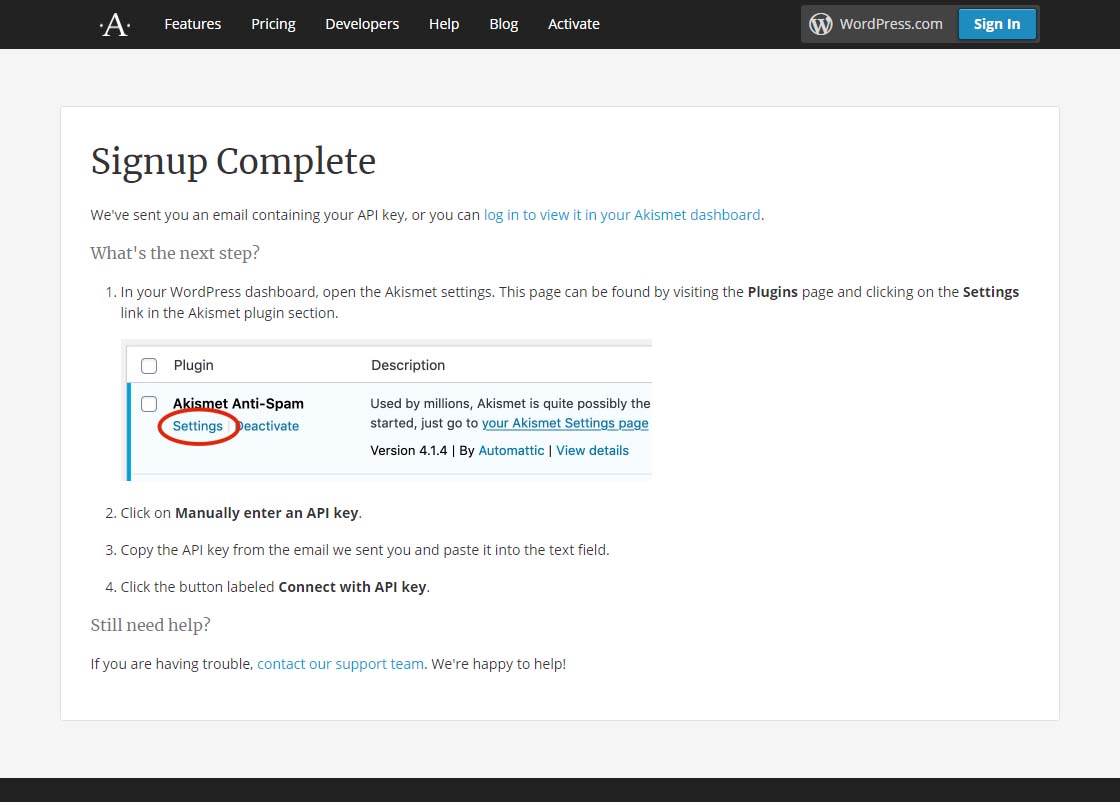 Akismet signup complete page
Finally, it is suggested that while on that settings page in Akismet, you can choose to show the number of approved comments beside each comment author and choose whether to show a privacy notice or not. Then just click the Save Changes button and you are on your way!










 European Union General Data Protection Regulation Compliant