by Charles Oropallo | Nov 26, 2024 | Do-It-Yourself, Technical Help
Resolving Default Page Mismatches
 We had a website transferred to us for hosting by a client who did not know about resolving default page mismatches. This occurs, for example, the a page not found error happens when a site visitor is clicking on your navigation trying to get back to the home page. When hosting a website, ensuring that the correct default page is served when visitors navigate to the root domain (e.g.,
 exampledomain.com) is critical. A mismatch between menu navigation items and the actual default page can confuse visitors and lead to a poor user experience. Below, I’ve outlined several methods to address such issues. Each method depends on the tools and access available on your hosting environment.
1. Redirect Default Page Using a New default.htm File
The simplest solution is to create a default.htm file that redirects visitors to the correct index.html file.
Steps:
- Create a new file named
default.htm in the root directory of the website.
- Add the following HTML code to the file:
<!DOCTYPE html>
<html lang="en">
<head>
    <meta http-equiv="refresh" content="0;url=index.html">
    <title>Redirecting...</title>
</head>
<body>
    <p>If you are not redirected, <a href="index.html">click here</a>.</p>
</body>
</html>
- Save and upload the file to the server.
When visitors access exampledomain.com/default.htm, they will be automatically redirected to index.html.
2. Set Default Pages in Virtualmin
If your hosting server uses Virtualmin, you can configure the default pages it prioritizes when serving the site.
Steps:
- Log in to Virtualmin.
- Navigate to the specific domain by selecting it from the dropdown.
- Go to Server Configuration > Website Options.
- Locate the option for “Default index file names” or similar.
- Add
default.htm to the list if it is not already present. For example:
index.html index.htm default.htm
- Save the changes and reload the website.
With this configuration, default.htm will be recognized as a valid default page alongside index.html.
3. Use an .htaccess File
You can also use an .htaccess file to specify which files should be served as default pages.
Steps:
- Access the root directory of the website via FTP or the file manager.
- Open or create a file named
.htaccess.
- Add the following lines to the file:
DirectoryIndex default.htm index.html index.htm
- Save the file and upload it to the server.
This tells the server to prioritize default.htm as the default page. If default.htm is not found, it will fall back to index.html or other specified files.
4. Update Navigation Links in the Website’s Code
If all navigation menu items point to default.htm, you can update the site’s HTML files to point to index.html instead.
Steps:
- Download the HTML files that contain navigation links.
- Search for
default.htm in the code and replace it with index.html.
- Save and upload the updated files to the server.
This ensures that navigation links point to the correct file and prevents further confusion.
5. Configure the Web Server Directly
For advanced users with root access to the server, you can modify the web server’s configuration files to set the default page order.
Apache Servers:
- Edit the Apache configuration file (e.g.,
/etc/httpd/conf/httpd.conf or /etc/apache2/apache2.conf).
- Find the
DirectoryIndex directive and modify it:
DirectoryIndex default.htm index.html index.htm
- Save the file and restart Apache:
systemctl restart apache2
Nginx Servers:
- Edit the server block configuration file (e.g.,
/etc/nginx/sites-available/exampledomain.com).
- Modify the
index directive:
index default.htm index.html index.htm;
- Save the file and restart Nginx:
systemctl restart nginx
6. Combine Redirect and Navigation Fixes
For maximum compatibility and user experience, you can combine several methods. For example:
- Use the
.htaccess file or Virtualmin to prioritize default.htm.
- Add a redirect in
default.htm for edge cases.
- Update all navigation links to
index.html.
Final Thoughts on Resolving Default Page Mismatches
Choosing the right method depends on your hosting setup and access level. If you’re looking for a quick fix, creating a redirect in default.htm is the easiest option. For a more permanent and scalable solution, consider updating the server configuration or .htaccess file.
Always remember to test changes thoroughly to ensure they work as expected before making them live. This will prevent any disruptions for your website’s visitors.
And, finally, at CharlesWorks we take care of these types of issues for you.


by Charles Oropallo | Jan 3, 2021 | Do-It-Yourself, Technical Help, The CW Corner, Website Development, WordPress
I wanted to create a custom HTML code function, so made one that will generate a line feed. I tested it to neaten up the output from my favorite WordPress statistics plugin: WP-Statistics by Verona Labs.
This shortcode gives the ability to add line feeds to WordPress page, post or report outputs to improve their readability. The function can easily be modified to generate any HTML output by doing this:
- rename “newline” in the “add_shortcode” line to whatever you’d like the shortcode to be named
- adjust the HTML code inside the quotes in the “return” line
In this example, we’ll create the line break shortcode.
Creating the Line Break Shortcode
Adding shortcodes in WordPress is easily accomplished by simply inserting the appropriate coding for the shortcode into your child theme’s functions.php file.
Note: Child themes should always be used. Changes made directly to the parent theme’s files are usually overwritten each time the parent theme is updated.
To add the code, first back up your site and then do the following:
- Log into the WordPress Dashboard as an administrator
- Navigate to Appearance > Theme Editor
- Select Theme Functions (functions.php) under Theme Files in the right column
- Add the short function code lines below
/* -- Start of line breaks shortcode --*/
function line_break_shortcode() {
return '<br />';
}
add_shortcode( 'newline', 'line_break_shortcode' );
/* -- End of line break shortcode --*/
Adding Line Breaks
Once the code has been added to your functions.php file, all you have to do is add the
shortcode in your text to generate a line feed at that point. The beauty of doing this as a shortcode is that it can be inserted in places that do not normally allow you to add them – like in the email output of the WP-Statistics plugin.
Note: When testing your output from the WP-Statistics plugin, there is a convenient feature that allows you to send output every minute to see what you will be sending. As a rule I normally have the report set to send daily.
A Working Example
There were a couple of WP-Statistics report items that were of particular interest to me. One is the last post date. This is handy as a reminder when one should add one or more posts to a site – especially a blog – so the site content doesn’t appear stale (or as an alternative, simply do not show blog post creation dates). Even if you are not displaying the post dates on the site, it is good to know when you last posted something.
An example of the report pattern I used was this (note that in some WordPress themes the “[” and “]” characters in the example below display as repeated – there should only be one “[” opening shortcode character and one “]” closing shortcode character surrounding the shortcode itself when you use it):
WP Statistics report for https://CWCorner.com WordPress site:
[newline]
_______________________________________________
[newline]
[newline]
Last post date: [wpstatistics stat=lpd]
[newline]
Total Site Posts: [wpstatistics stat=postcount]
[newline]
Total Site Pages: [wpstatistics stat=pagecount]
[newline]
Total Site Users: [wpstatistics stat=usercount]
[newline]
Online Users at Report Time: [wpstatistics stat=usersonline]
[newline]
_______________________________________________
[newline]
[newline]
Today's Visitors so far: [wpstatistics stat=visitors time=today]
[newline]
Today's Visits so far: [wpstatistics stat=visits time=today]
[newline]
Yesterday's Visitors: [wpstatistics stat=visitors time=yesterday]
[newline]
Yesterday's Visits: [wpstatistics stat=visits time=yesterday]
[newline]
_______________________________________________
[newline]
[newline]
Total Visitors: [wpstatistics stat=visitors time=total]
[newline]
Total Visits: [wpstatistics stat=visits time=total]
[newline]
_______________________________________________
[newline]
[newline]
End of WP Statistics Report.
[newline]
I used the underline characters to separate various parts of the output for clarity. This report pattern generated a nicer, more readable report that even looked great when viewing it on my cell phone.
While I initially added this function as a way to neaten up the output of the WP-Statistics email report – the function should work just about anyplace in WordPress except in the PHP coding itself.
by Charles Oropallo | Dec 15, 2020 | Do-It-Yourself, Internet, Security, Technical Help, The CW Corner, Website Development, WordPress
Akismet provides a convenient and free way to protect your personal WordPress site or blog from spam.
Many times we’d like to allow comments to be left on our WordPress site. The hassle with this can be the tremendous amounts of spam that come through the forms on websites.
Akismet is a compact WordPress plugin that filters the incoming comments. It is pretty straightforward to use and pretty easy to set up as well.
Install the Akismet plugin
The first step in this process is to ensure that the Akismet plugin is installed in your WordPress website:
-
-
- Log into your WordPress website’s dashboard as an administrator
- Click on Plugins in the left dashboard navigation column
- Look and see if Akismet is listed – if it is – and it is not activated you can proceed to the Akismet Setup step below – otherwise
- Click on Add New under Plugins in the dashboard navigation column
- If you don’t see Akismet in the plugins, then in the text box to the right of the work Keyword in the row starting with Featured type in Akismet – then click on its Install Now button. Do not activate it yet.
Perform the Akismet Setup
To set up Akismet in your website, you will need an API code from the Akismet site. The first step in that process is to navigate to:
https://akismet.com/plans
This (as of the time of this writing) brings you to a page that should look similar to the screenshot below.
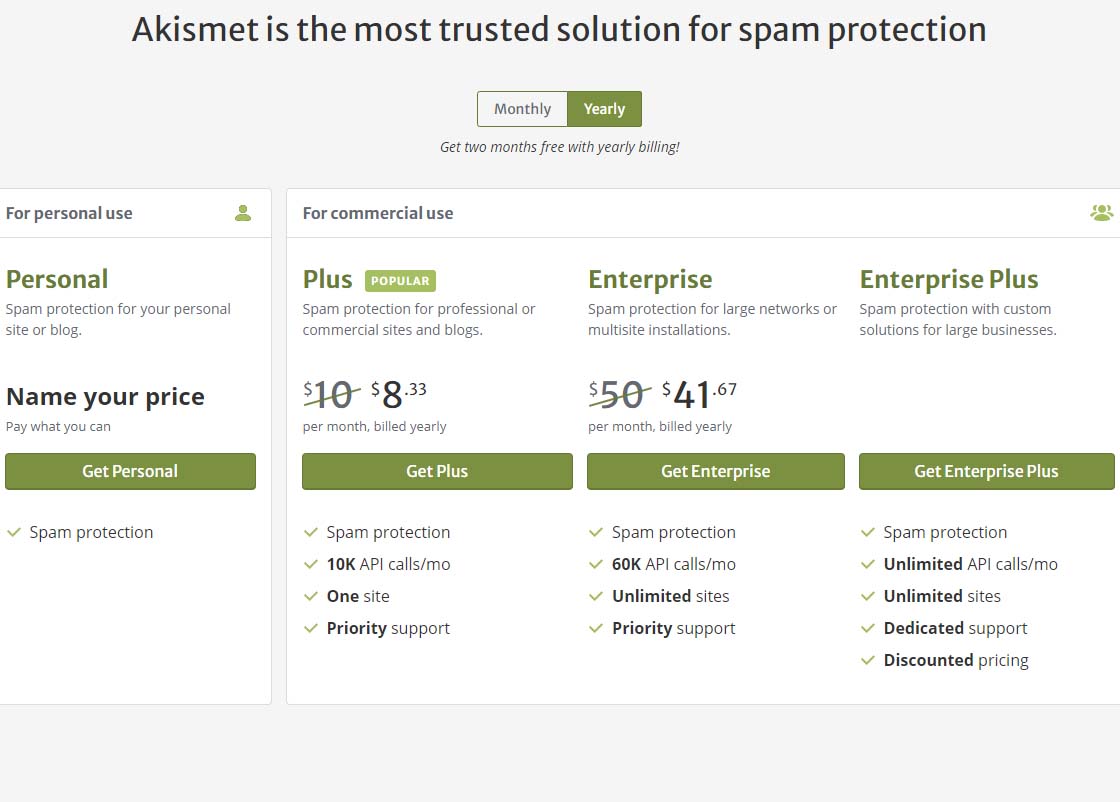 Akismet offering pricing page
To get the free version of Akismet comment spam protection, you will need to click on the Get Personal button on the above page.
Once you’ve done that, you should see a page similar to the one below. Before attempting to fill out anything on this page, we need to set that $36 / YEAR to $0 / YEAR. Click on the $36 / YEAR box and drag it to the left.
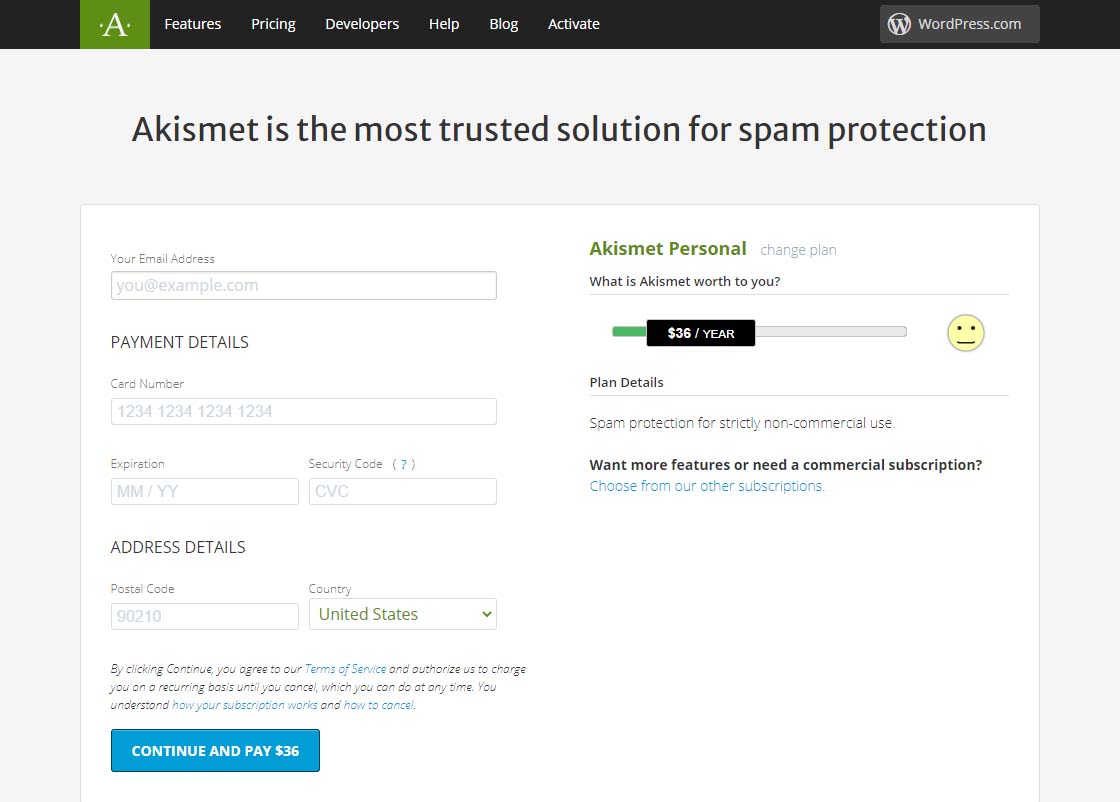 Akismet Default $36 per year page
Dragging that $36 / YEAR box to the left should change the page to display something like the one below showing 0$ / YEAR. You can also see that the information to fill in has changed.
Akismet $0 per year page
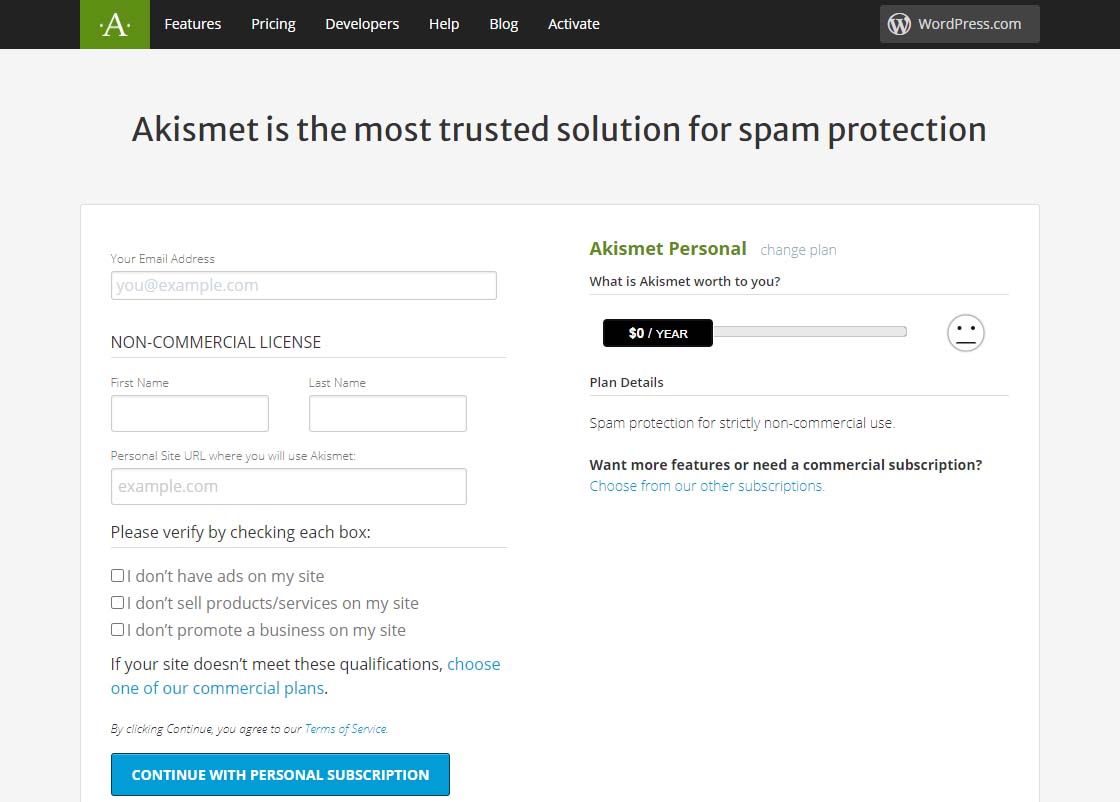 Akismet $0 per year page
Now fill in the information completely. Note that you need to be able to check all three checkboxes indicating the following:
-
-
- you don’t have ads on your site
- you don’t sell products/services on your site
- you don’t promote a business on your site
If these are the case, then you will qualify for a free, personal plan.
All you have to do once you have gotten this far is follow the directions on the page below.
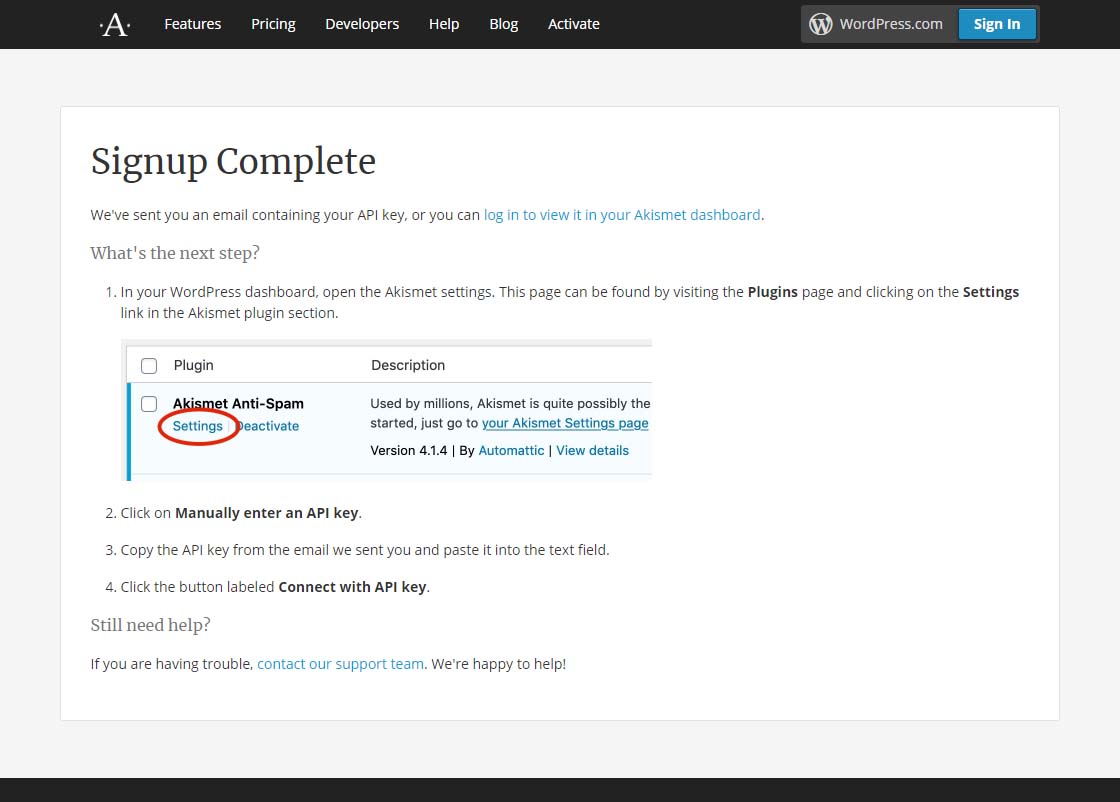 Akismet signup complete page
Finally, it is suggested that while on that settings page in Akismet, you can choose to show the number of approved comments beside each comment author and choose whether to show a privacy notice or not. Then just click the Save Changes button and you are on your way!
by Charles Oropallo | Nov 15, 2020 | Do-It-Yourself, Technical Help, WordPress
Every piece of popular software gets updated over time. PHP is no different.
PHP 7.4 is the latest version of PHP 7 at the time of this writing. It was originally rolled out November 28, 2019 and will receive security support until November 28, 2022. It also appears that PHP 7.4 may be the last of the PHP 7 releases, as PHP 8.0 was rolled out on November 26, 2020.
This is all great news, since each newer PHP version so far has continued to provide:
- considerable (but not total) backward compatibility
- faster execution speeds
- greater security.
We’ve seen many PHP upgrades since running WordPress over many, many years. Our preliminary testing has always shown that many WordPress plugins and themes don’t work seamlessly with new versions of PHP as they are rolled out. As for PHP 7.4, the WordPress core and its latest default themes do. Unfortunately, many sites will simply break if caution isn’t taken to ensure all of their components – the core, the plugins and the themes – are PHP 7.4 compliant. For this reason, we usually don’t switch PHP to the later version until we are confident most things will work. When you think about the many thousands of themes and plugins out there for WordPress, it is no surprise that sometimes this takes longer than a year.
WordPress PHP notifications
PHP versions older than PHP 7.2 now trigger the red circle with an exclamation point PHP notification that administrative users see in the WordPress dashboard.
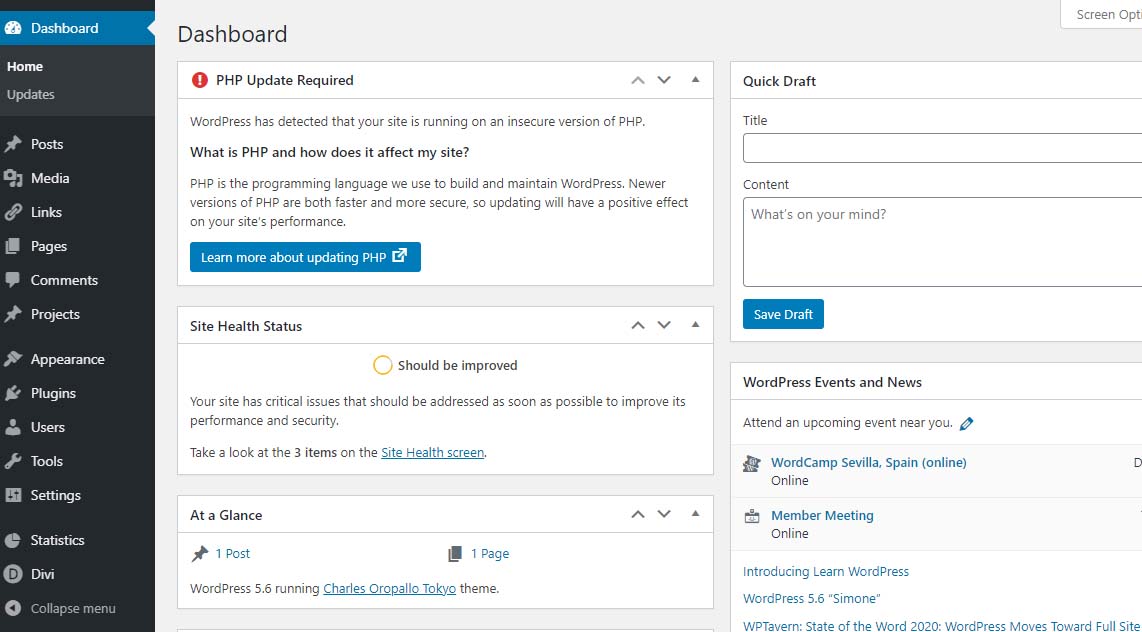 PHP update required notification
Site Health Status – Should be improvedBear in mind that WordPress only issues a warning about 7.1 and lower. The red notice in the dashboard is not shown for higher versions. Navigating to Tools > Site Health yields more details about site health.
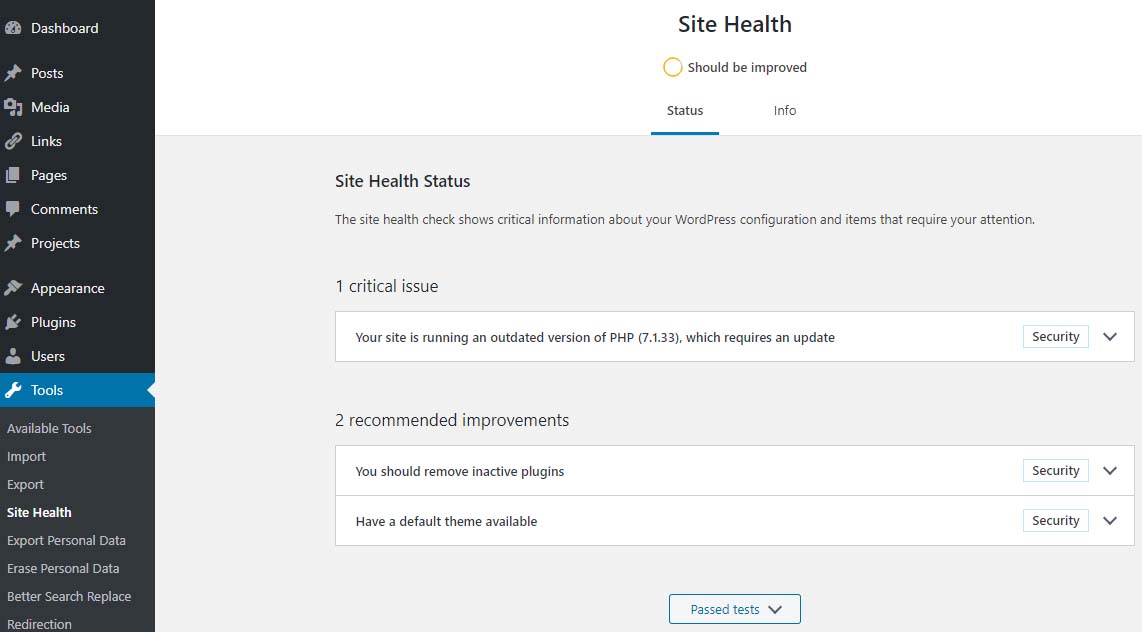 Site Health – Should be Improved
Site Health Status – 1 critical issue – running outdated version of PHP 7.1 requires an updatePHP 7.2 just went to end of life November 30, 2020 – hence the red PHP update required notice that shows in the dashboard for anything older than 7.2 doesn’t show if you are running PHP 7.2 and above.
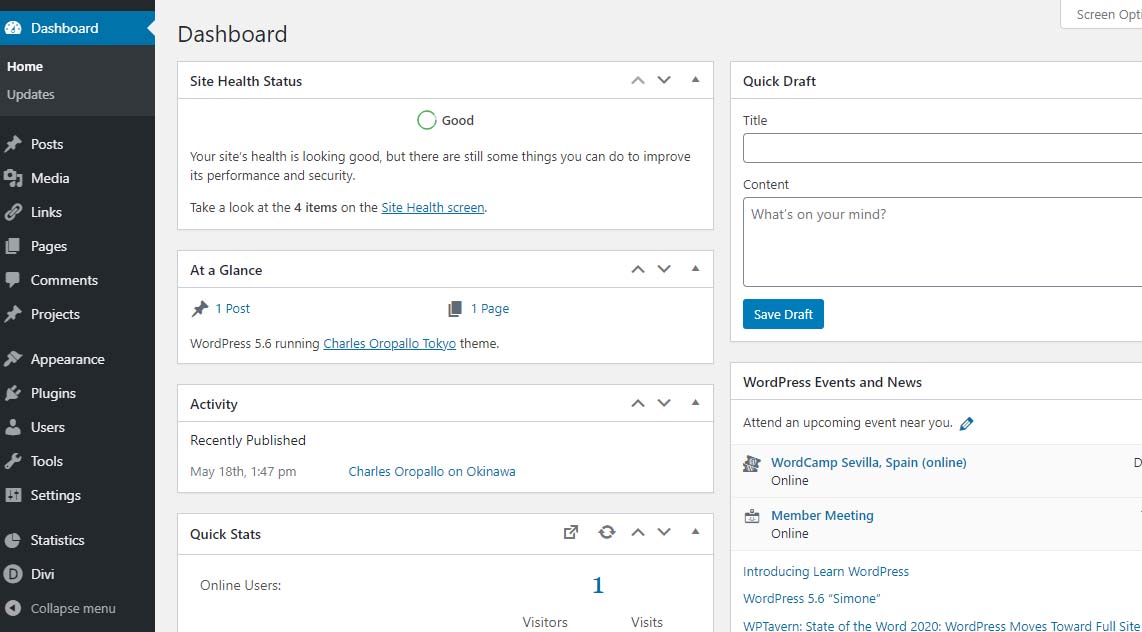
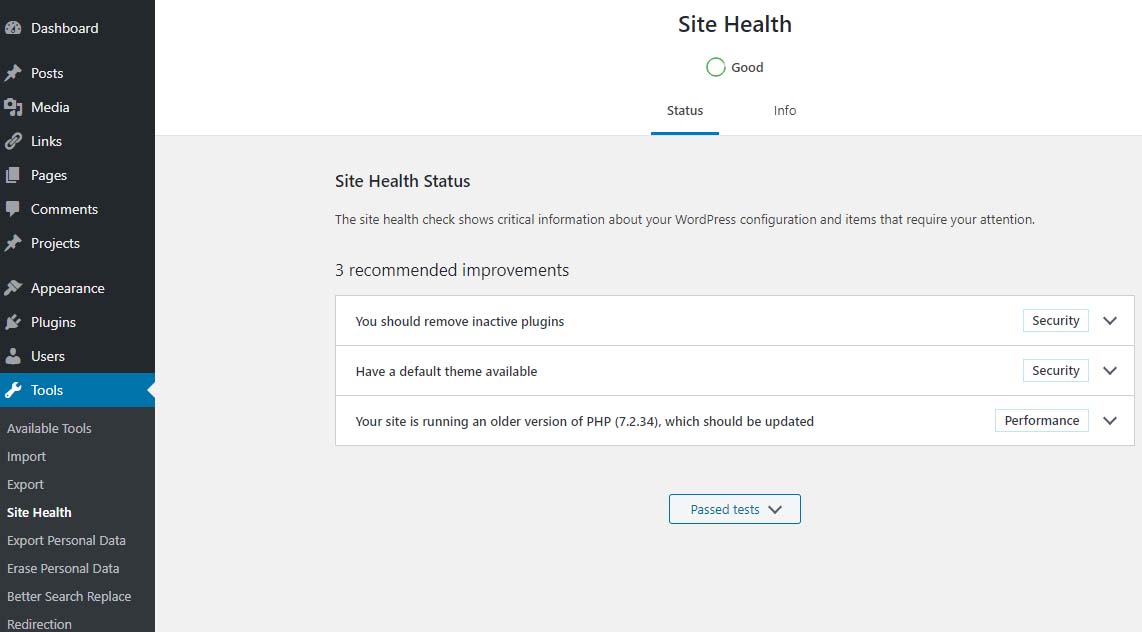 Site Health Status – Good
PHP 7.2 which should be updatedIf you are running PHP 7.3 (or newer) you will not get the red notice described above. However, in the site health you will see an indication stating “Your site is running an older version of PHP (7.3.x) which worries many when they see it.
 Site Health – Good
Site Health Status – 1 recommended improvement – running an older version of PHP – PHP 7.3.25The fact is that PHP 7.3 will be receiving security updates until December 6, 2021. Given that, there is plenty of time to get ready for PHP 7.4.
 Site Health Status – Good
PHP 7.2 and aboveThe plan at CharlesWorks is to make PHP 7.4 available in the upcoming months. When that happens, you will notice that each of the PHP 7.x versions you see in the DirectAdmin interface will be bumped up by one version. So you will always still be able to go back to 7.3 if needed.
PHP 8.0 was released on November 26, 2020 with an expected security support date of October 26, 2023. There appears to be more incompatibility between it and PHP 7. CharlesWorks would not expect to roll this version out until nearer the end of 2021. Let’s give the world a chance to find all of the bugs for us.
by Charles Oropallo | Nov 12, 2020 | Do-It-Yourself, Technical Help, The CW Corner, Website Development, Website Updates, WordPress
Sometimes in a WordPress website an issue develops where when loading images into media library, only a blank thumbnail shows. It appears a space is created in the database for the picture but there is no content in it.
After testing compatibility of plugins, themes, php, etc., the problem persisted.
To resolve this, one can navigate here logged into WordPress as an administrator:
Go to Dashboard > Settings > Media
Make sure the correct default file path is showing there. When troubleshooting this issue on a site that was unable to upload media files, the file path was shown as:
/home/username/domains/thedomainname.com/private_html/wp-content/uploads
Note that the “username” and “thedomainname.com” in the above and below path examples will be the Linux username and the actual site domain name respectively that you are troubleshooting.
The fix
When this path was removed, the image file upload worked normally again and the problem appeared to be solved.
Possible Reasoning or Causes
In the DirectAdmin path structure, there are two places the website’s servable coding (like WordPress or HTML sites or Joomla, etc.) might be stored:
/home/username/domains/thedomainname.com/public_html
or
/home/username/domains/thedomainname.com/private_html
The “public_html” folder is where DirectAdmin normally places the website’s code (again, referring to all the files and programs that make up the actual WordPress or HTML or Joomla site’s coding, etc.).
The “private_html” folder is where DirectAdmin normally tries to place the website’s code when its content is encrypted. That’s why there is an option in DirectAdmin’s site control panel that allows one to “Use a symbolic link from private_html to public_html”. This option allows for using the same data in http and https.
The suspicion here is that a setting got changed or an update occurred causing the WordPress system to use the private_html setting when the site resides in public_html. Removing the file path from the settings forced WordPress to use where the system actually defaulted to – which cleared the problem.
We may never know how the setting actually got bunged up, but it is an easy fix once it is.


 European Union General Data Protection Regulation Compliant